When I was contacted to make some tutorials for their site I was absolutely thrilled !
Just in case you haven't heard, they have over 500 designs of cookie cutters, great prices ( $1 per cookie cutter), fast and low shipping and a great customer service.
The Cookie Cutter Company is in the process of launching a page on their site where their customers can maximize their cookie making enjoyment, see different ways the cutters could be used, and more importantly, not feel overwhelmed baking and decorating cookies.
They want to show you cookie crafting ideas that will allow you to create treats that are as delightful to the eye as they are to your taste buds.
Make sure you check the end of this post for a FANTASTIC GIVEAWAY AND A PROMO CODE JUST FOR MY READERS!
For those of you who have never decorated cookies before I have broken down the various steps as thoroughly as possible, I am sure you will have fun decorating your cookies!
FALL COOKIES
I like to plan the design of my cookies before I start decorating them ,specially now,with a 2 week old new born and a 4 week old puppy,my head is pretty much spinning around!
To make these FALL Cookies you will need:
- Red, orange and brown royal icing ( thick for pipping and thin to flood the cookies)
- Pastry bags, couplers and tips #1 and #2
- Red and gold sanding sugar
- White Nonpareils
- Gold luster dust ( optional)
- Paintbrush
- Thin paste of meringue powder and water
- Toothpicks
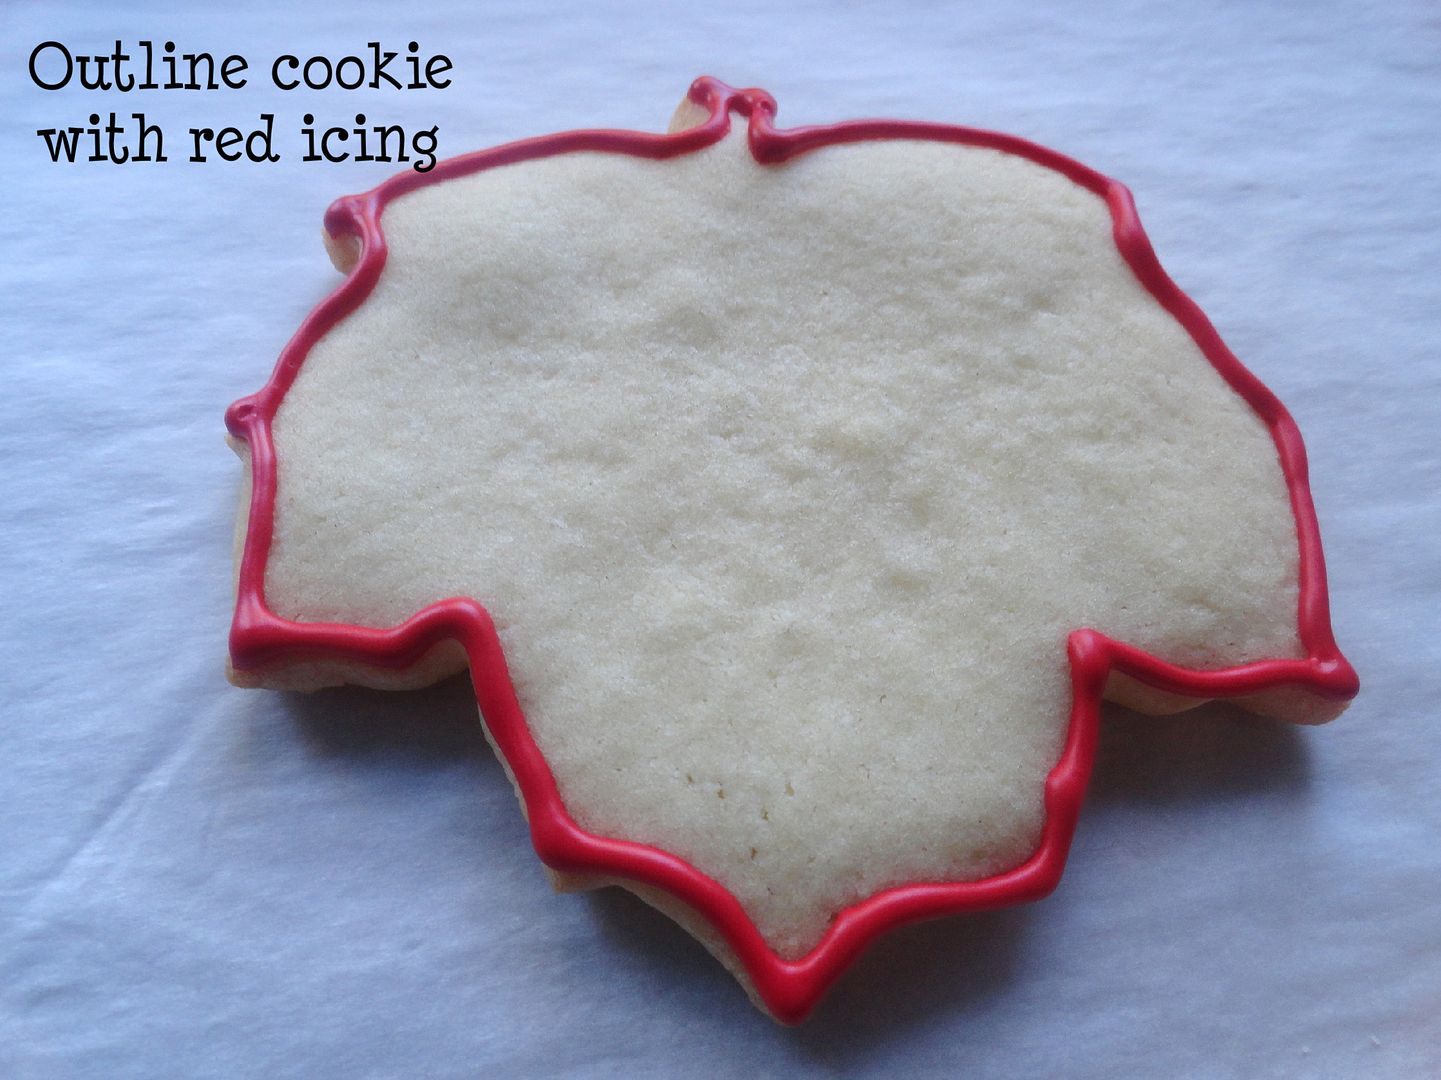
Making the Maple Leaf Cookies
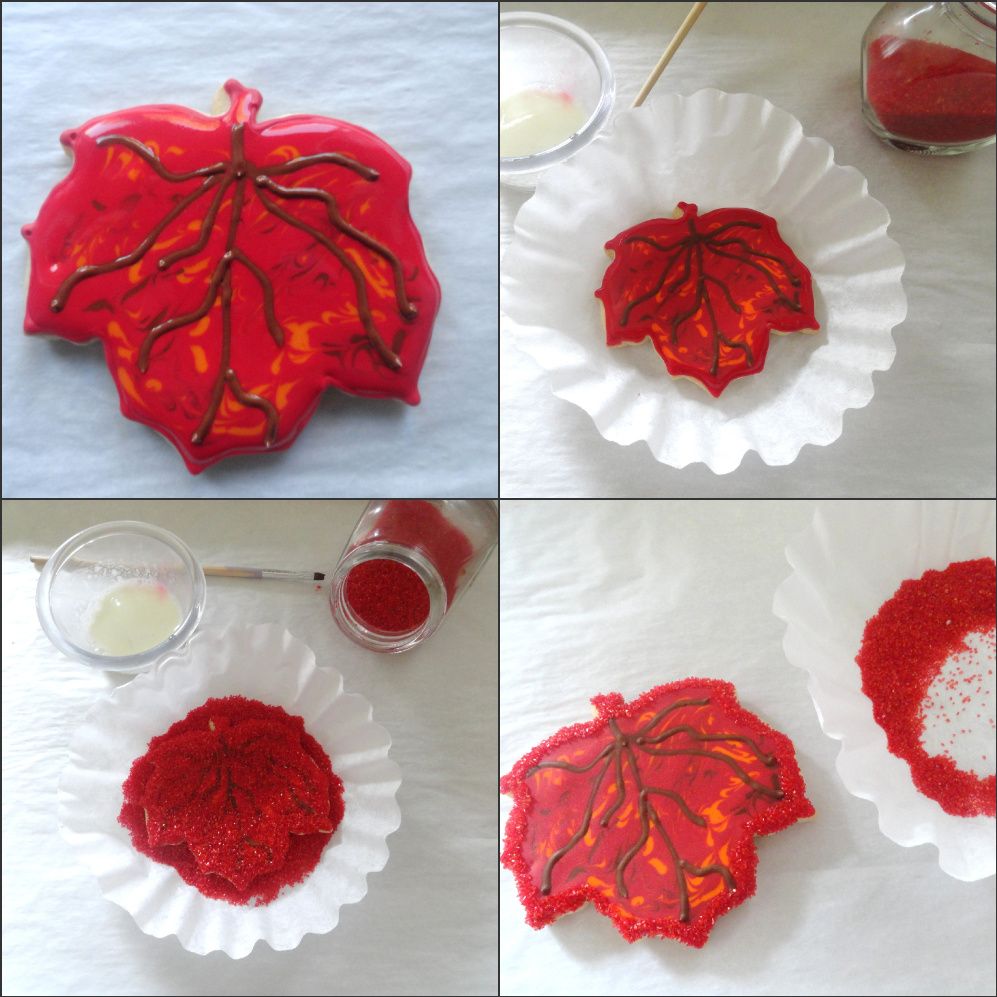
While the cookie is still wet, pipe brown veins and let the cookie dry for a few hours. When the cookie is completely dry,use a paintbrush dipped in the mix of meringue powder and water and outline the cookie, then dust with the red sanding sugar. Let it dry for a couple of minutes and brush off excess sugar.
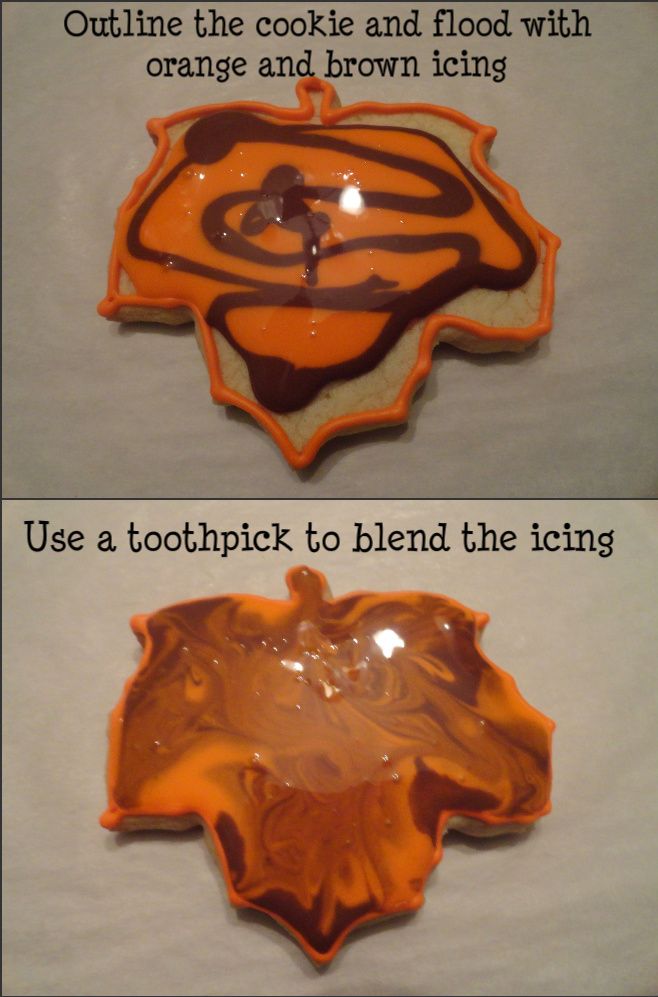
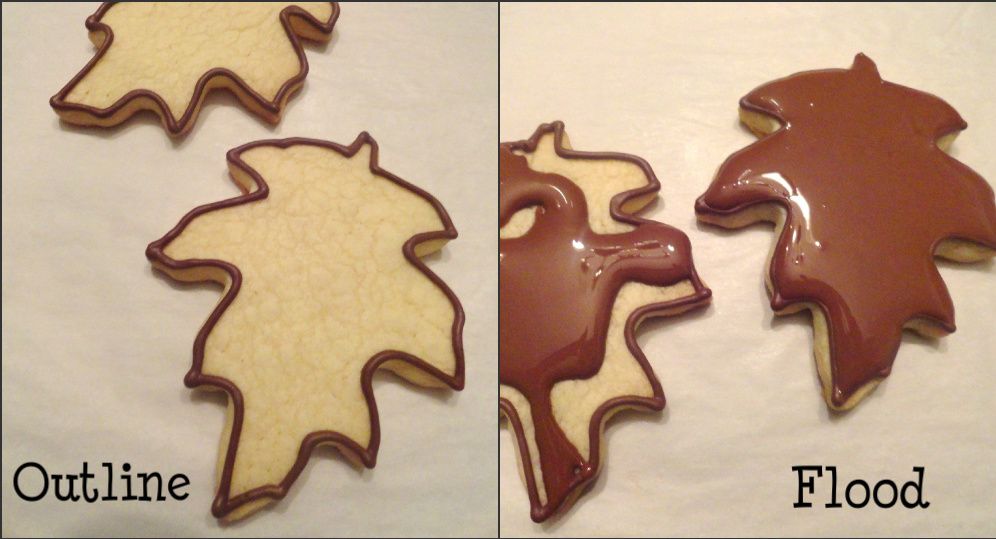
After you blend the icing let the cookie dry for a few hours. Then get some inspiration from some of the leaves of your backyard :),outline the cookie with brown icing and pipe veins on the cookie using tip #1.
Making the Oak Leaf cookies
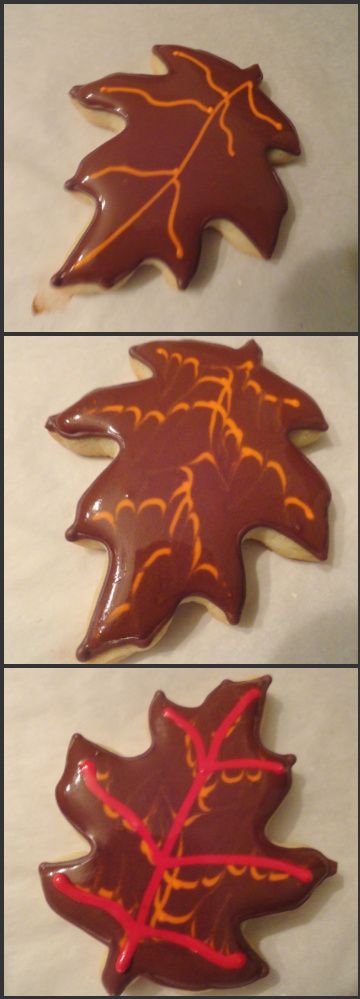
This is a pretty simple desing. After you flood the cookie let the icing dry and then pipe the leaf veins ( I used tip #2)
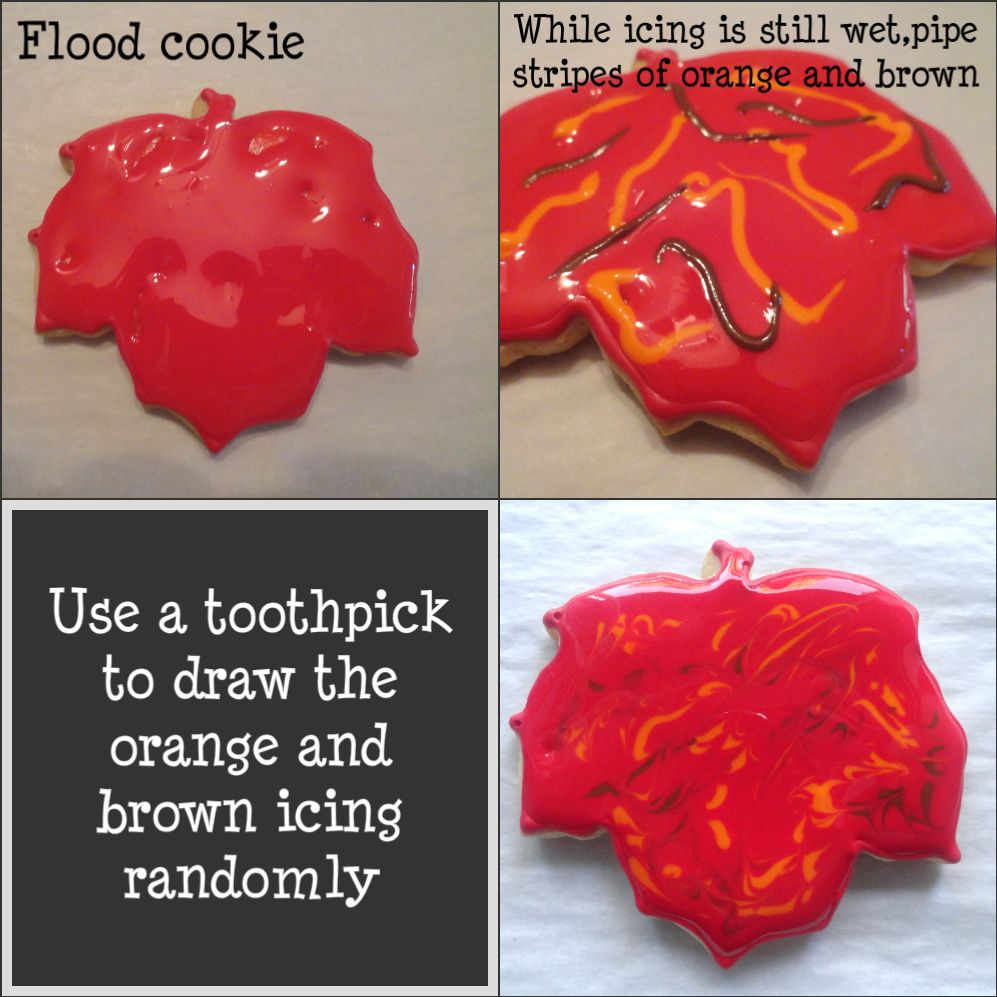
For this other leaf, after I flooded the cookie I piped orange veins on the wet icing and draw a toothpick throughout the cookie, then I piped red veins on the still wet icing.
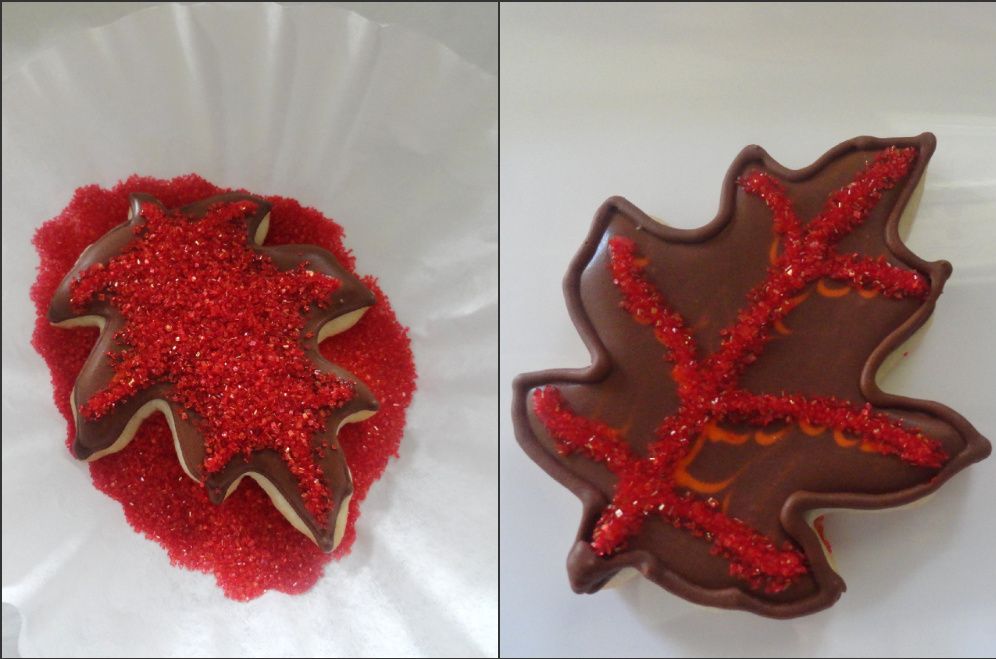
When the cookie is completely dry,use a paintbrush dipped in the mix of meringue powder and water and outline the cookie's veins, then dust with the red sanding sugar. Let it dry for a couple of minutes and brush off excess sugar.
I let the cookie dry for a few hours and use a paintbrush dipped in the mix of meringue powder and water and outline the cookie's veins, then dust with the red sanding sugar. Let it dry for a couple of minutes and brush off excess sugar
Making the Acorn cookies
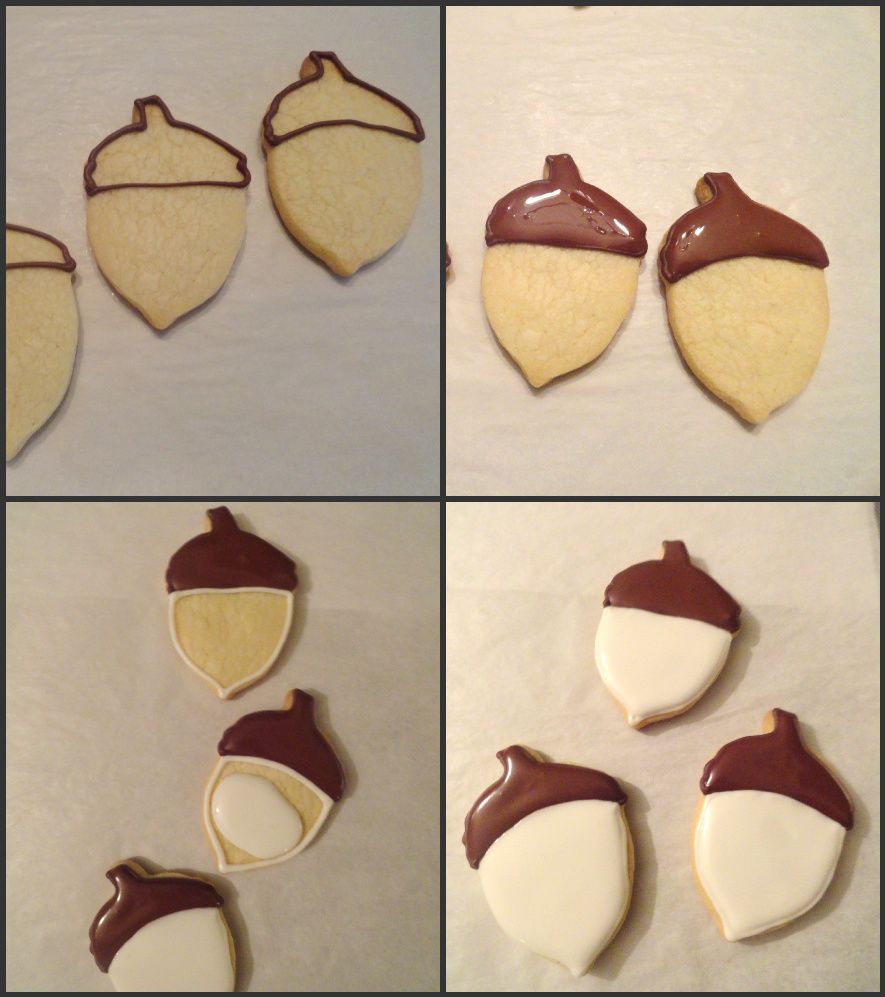
Outline and flood acorns and let them dry for a few hours.
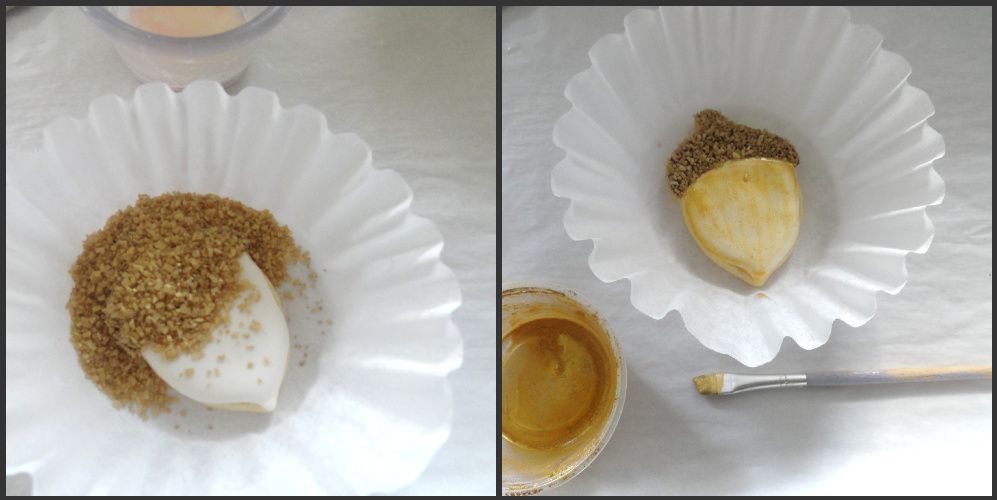
For the gold acorn: Use a paintbrush dipped in the mix of meringue powder and water and brush the acorn's cupule, then dust with the gold sanding sugar. Let it dry for a couple of minutes and brush off excess sugar.
Mix some gold luster dust with a few drops of vodka and paint the acorn.
Mix some gold luster dust with a few drops of vodka and paint the acorn.
For the white acorns: After the cookies are dry use a paintbrush dipped in meringue powder mixture and brush the acorns, then dust one with the white nonpareils and the other one with the sanding sugar. Let it dry for a couple of minutes and brush off excess sugar
Well I hope you can have as much fun as I did decorating your own cookies.
NOW, ARE YOU READY FOR THE GIVEAWAY?
 |
Enter to win your Chritsmas cookie cutter set by leaving a comment on my blog, for extra entries: (Please leave a separate comment for each entry)
Like The Cookie Cutter Company on Facebook
Follow The Cookie Cutter Company on Twitter @CutMyCookie
Like Pink Little Cake on Facebook
Also, if you go to The Cookie Cutter Company site and want to start shopping right away, please use
CODE: PLK20
FOR 20% OFF YOUR SHOPPING!
It can't get any better than that! Happy shopping and good luck!
THE WINNERS OF THE GIVEAWAY ARE:
Mindy Percival said...
Thanks for the tutorial! They look like fun to make. Thanks for the chance to win the cookie cutters, I love your blog! :)
mariela said...
I always fallow your block..and love your hard work.you make woondefull cookies the derails on your cookies are amazing special on those cookies they look so real.i hope one day tasted them
Platinum Rose said...
I "liked" The Cookie Cutter Company on Facebook. mconrad333@gmail.com. I really hope to win this giveaway, would be a great "push" to make some adorable cookies for the holidays!
Congratulations and thank you for entering the giveaway.
Disclosure:
This is a sponsored post by The Cookie Cutter Company, all opinions are my own.









0 comments:
Post a Comment