As you can imagine, all of this leaves me with very little time for cooking and one thing I've been making a lot of around here is salad. I like making salad, layering the ingredients, balancing the toppings to make it look pretty, but I don't actually like eating it. I don't know, it just seems like so much chewing for not so much flavor or satisfaction. It's good for you though, so in an effort to be healthier I've been trying to come up with ways to make salads more exciting.
The first thing I did was to buy a small bottle of the very best, the uber yummy, thick and syrupy balsamic vinegar. There were days when I used to smother everything in ranch, but ever since I moved past the cheap grocery store balsamic, I haven't looked back. My current obsession is with the aged blackberry and ginger balsamic I bought at the French market a month ago. It's so good, I don't even temper it with olive oil. And on standby I have 18 year aged balsamic from Old Town Oil, which is also fantastic.
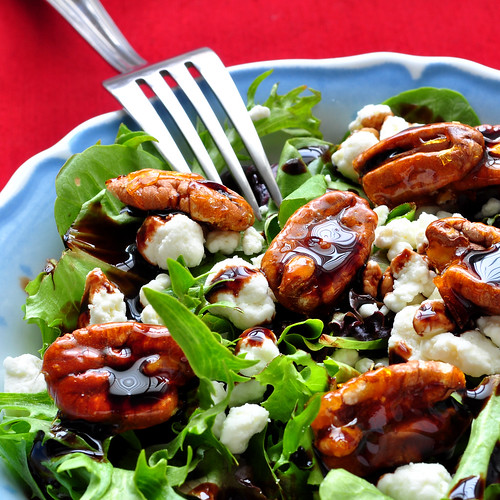
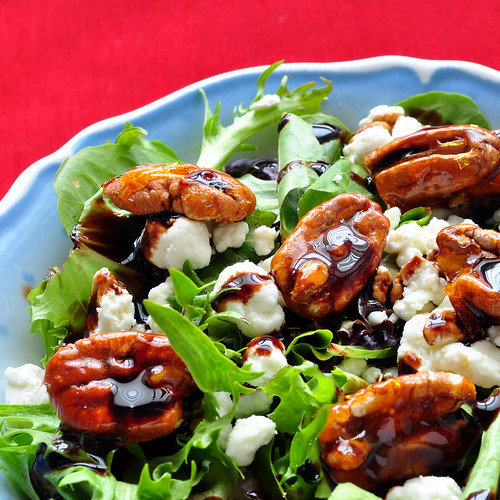
I top a bowl of mixed greens with crumbled goat cheese, sometimes little chunks of marinated beets, sometimes dried cranberries, but always with candied pecans. I don't know why, but even a few of these babies never fail to make me actually want to eat the big pile of greens underneath. And there's no reason to spend $10 for a tiny bag of candied pecans either when all it really takes is some sugar and some raw or lightly toasted pecans to make them yourself.
Just set aside a silpat or lightly greased cookie sheet, dump a half a cup of sugar into a pan and set aside a cup of pecans. You can toast your pecans or leave them raw, I've done it both ways and it really comes down to how lazy I'm being at the moment, it's delicious either way.
Try to keep the sugar in the pan in a nice thin and even layer, then crank up the heat and don't go anywhere! I keep the heat on high, but you may want to turn it down a little bit your first few times. It will take the sugar a little while to get going, but once it starts things go pretty fast and burned sugar smells horrible.
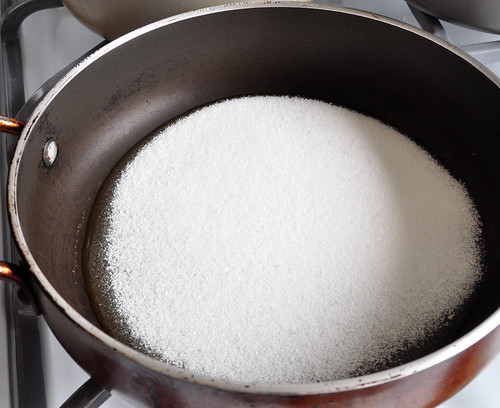
It will take a while, but eventually the sugar will start looking like wet sand and then slowly will start to melt around the edges. DO NOT STIR IT! Don't swirl the pan, don't even touch the spoon and for goodness sakes don't go anywhere.
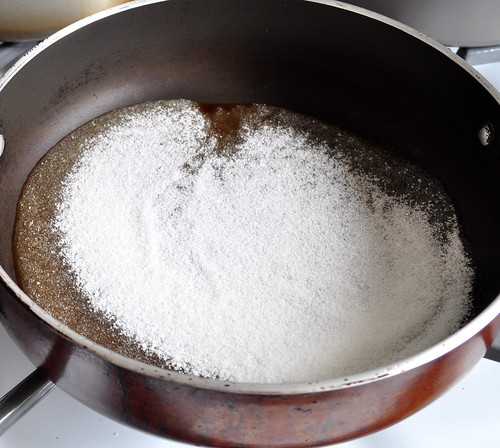
As the sugar starts to melt more you're going to see a bit of color development around the edges and there will still be some un-melted sugar in the middle, but at this point you're still okay, so just stick around and watch.
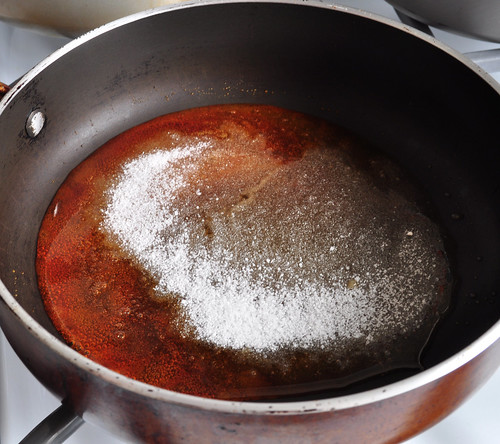
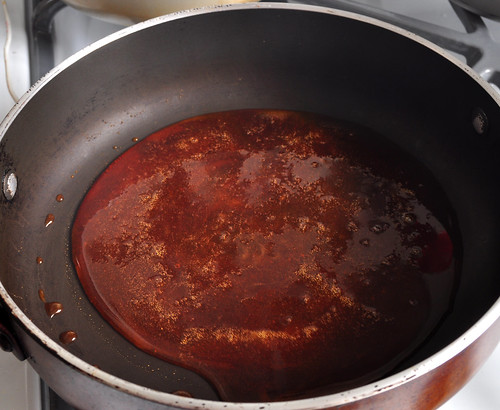
Once you get here, if you're really starting to get nervous, you can carefully nudge the hot sugar towards the un-melted pile, but don't stir or you'll end up with clumps. If you do get clumps, turn the heat down a bit and keep stirring until everything is even. Just be sure that you don't let the color get too dark. As soon as you reach a nice deep amber color like I have here, take the pan off the heat.
This, by the way, is also the first step to making caramel. If you were doing this in a deeper pot, you could CAREFULLY add cream a little at a time, stirring like mad, and you'll end up with yummy caramel topping. You could also add boiling water, also carefully and also a little at a time and also stirring like crazy, to make a caramel flavored simple syrup...which I'd imagine would make for some fantastic cocktails. Or you could keep going and stick with the salad plan. Up to you.
Working very quickly, stir in your pecans and spread everything out on your Silpat or greased sheet. The cooked sugar will set quickly so the faster you get this done, the easier and less messy things will go. Do not touch the sugar! It's basically boiling lava and it will hurt like nothing else, so don't touch anything until it's completely cooled.
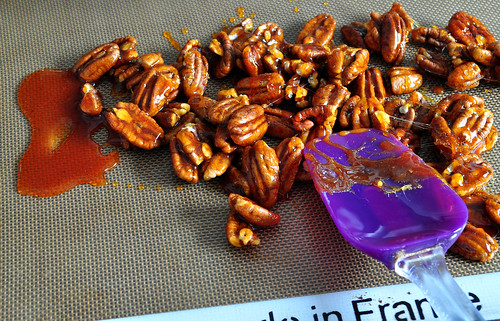
Once the sugar has cooled completely you can break apart the pieces and top your salad...or just eat them straight, but that would defeat the salad point.
P.S. My friend asked me to tell everyone that if something should go wrong during the caramelizing process and you burn the sugar, do not pour the hot bubbly mess down the drain. The sugar will seize and clog the drain. Then you will panic and break your favorite fork trying to chip away the clog, and then fill the sink with boiling water and hope that everything melts before your boyfriend shows up and laughs at you. The best thing to do is to just let the mess cool a bit in the pan and then soak the pan in hot water. It will come right out and then you can try again.


0 comments:
Post a Comment