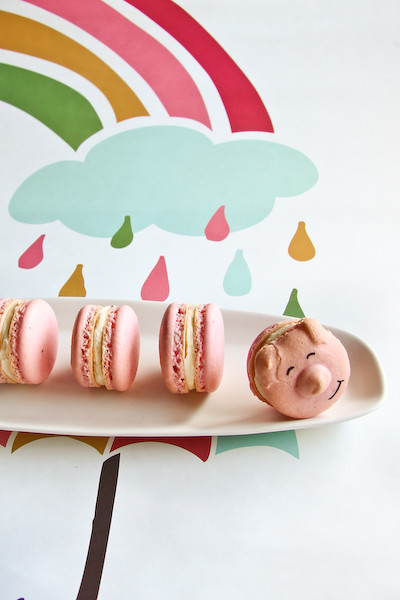
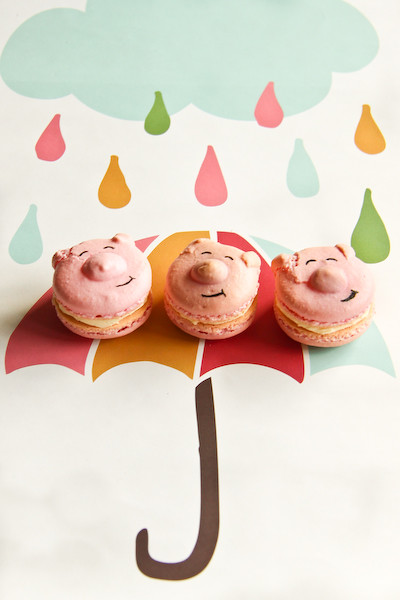
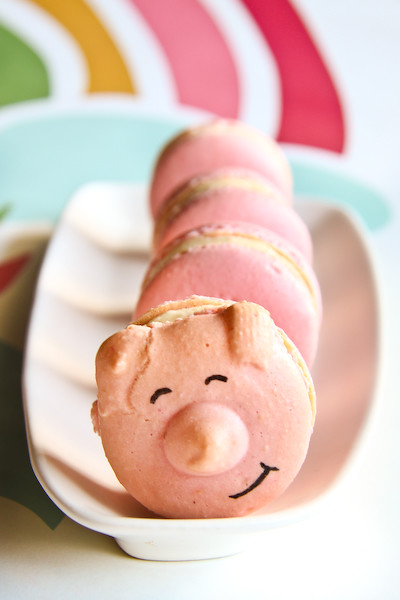
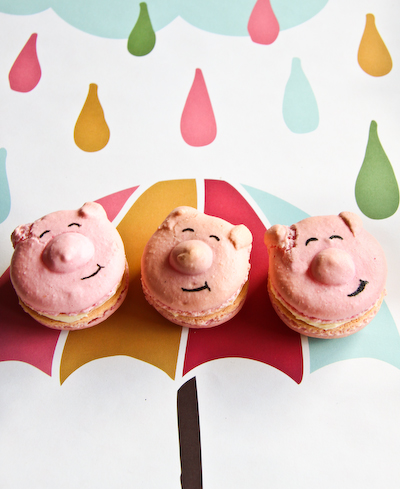
Oh my GAASH, it's a little piggy! On a macaron! He's so cute I couldn't eat him. No really, I haven't eaten any of the the little piggy faces, I had to taste test one that didn't have a face on it. I've had a break from baking macarons lately, I was starting to get a little sick of it and I don't want to bake up boring macarons. Doughnut Macarons - definitely not boring. Plain macarons with chocolate ganache - pretty boring, unless you put them on top of a triple-triple chocolate cake. But I could feel my interest waning so I took a break...until the piggies came along. Sure they're only filled with a simple vanilla bean icing, but who needs complicated flavours when they've got fat widdle noses and ears?
These adorable little piggy macarons nearly didn't see the light of day. I originally thought up this idea with the intention of making a special little post for Leona on her birthday. Piggy macarons for Pigged-Out, hehe geddit?! I'd seen the sweet piggy buns from Chef's Gallery but hadn't seen it done on a macaron yet. As per usual, things did not go to plan. I thought it would be so simple. My first attempt was over before it even started, so there was no way I'd be able to give them to her in person. Then I was hoping to get them done in time to post them up on my blog on Sunday for her actual birthday...but I ended up with horrible cracked piggy macaron faces. Poor mutilated piggies. I gave it one more go and enough of them were decent (though you can still see some cracks). Make them at your own risk! I think the cracking tends to happen if you don't let the surface of the macaron dry enough before piping on the nose and ears, and if you use your finger to mess around with it like I did.
Piggy Macarons
(makes approximately 10-15 fairly large macarons)
100g aged egg whites (you can use fresh eggs too, just make sure they are room temperature. I always use fresh these days, and zap it in the microwave on defrost for 10 seconds)
110g almond meal, dried in a cool (100 degrees C) oven for 5 minutes and sifted
200g icing sugar
50g caster sugar
Optional: 1 tsp powdered egg whites (available from The Essential Ingredient)
Vanilla butter icing:
100g unsalted butter, cut into small pieces
200g icing sugar, sifted
1/2 tsp vanilla bean paste
To decorate: liquid black food colouring (available from the supermarket) or edible ink pens
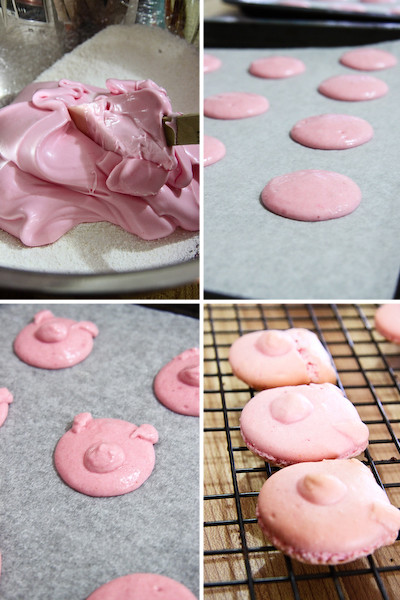
Line two baking sheets with baking paper. Place icing sugar in food processor and pulse for a minute to remove any lumps. Stir in almond meal and pulse a few times to combine. Place in a large mixing bowl. Using an electric mixer, beat egg whites and egg white powder in a medium mixing bowl until the egg white powder dissolves and it reaches soft peaks. With the mixer on high speed, gradually add sugar and beat until it reaches stiff peaks.
Add meringue (and powdered food colouring) to your dry mixture and mix, quickly at first to break down the bubbles in the egg white, then fold carefully as the dry mixture becomes incorporated and it starts to become shiny again. Take care not to overmix, the mixture should flow like lava and a streak of mixture spread over the surface of the rest of the mixture should disappear after about 30 seconds. Place in a piping bag and pipe rounds of about 4cm diameter on lined baking sheets or silicon baking mats, leaving a small amount of mixture leftover in the piping bag for decorating your piggy faces (around 1/4 cup) Gently rap your baking sheets on your bench top to remove any extra bubbles from your piped shells.
Leave shells on bench to dry for about 30 mins to an hour, so that when you press the surface of one gently it does not break. Carefully pipe on the piggy noses into the middle of the half the piped macaron shells using a narrow round piping tip. Using a wide, flat piping tip, pipe on the little piggy ears, starting from the edge of the macaron. Take care not to disrupt the dried surface of the piped macaron rounds or it will be more likely to crack in the oven. If you can be bothered you can pipe little squiggles (for piggy tails) on the half of the macarons that will end up being the backs to the piggy face macarons.
Preheat your oven to 140-150 degrees C (temperature varies depending on your oven) and dry piped macaron shells on bench for a further 30 mins to an hour. Place on top of an overturned roasting tray or another baking sheet if they are not professional grade. Bake for 13-15 minutes, depending on the size of your shells. Remove from the oven and cool on the tray for a few minutes, then gently remove from the sheet and place on a wire rack to cool completely.
To prepare the butter icing, remove butter from the fridge 30 minutes before starting. Beat butter on high speed with an electric mixer until light and fluffy. Add icing sugar and vanilla bean paste until smooth and fluffy. Using a knife or spoon, sandwich between macaron shells, using one piggy decorated shell and one plain shell. Using the black food colour and a wooden skewer, draw on the eyes and mouth of the piggies. Leave to dry and then refrigerate overnight. Can be stored in an airtight container in the fridge for several days. Serve at room temperature.
So Happy Birthday Leona! I hope you like these little piggies, I'm just sad I wasn't able to successfully bake them and give them to you in person before your actual birthday!
P.S. I think I should mention something about Tumblr. I am incredibly flattered whenever I get any link backs due to people sharing my photos on Tumblr, though sometimes I do think that the way that some people credit their sources on there is questionable (especially when they copy and paste my recipes without including a text link *cough*). But others do it properly and have lovely pages like Just Be Splendid. As a way of saying hi to all those people on Tumblr who are sharing my photos, I just started one myself: http://raspberricupcakes.tumblr.com/ There's not much there at the moment, at some point I might start putting photos up there. And maybe if you plan on sharing one of my posts on Tumblr you can let me know and I will reblog it. Share the love ;)



0 comments:
Post a Comment