
Have you heard of Frosting for the Cause?
Paula aka @Vanilla Bean Baker had this amazing idea of putting together "Frosting for the Cause" using our blogs to help raise funds for cancer cures and awareness. I am baking a difference for Frosting for the Cause and last week I shared my story and this tutorial with everyone. I haven't had any family members or friends that have been affected with cancer, but I have my own personal story, which you can read there.If you haven’t yet signed up for Frosting for the Cause, I hope you do now.
Paula aka @Vanilla Bean Baker had this amazing idea of putting together "Frosting for the Cause" using our blogs to help raise funds for cancer cures and awareness. I am baking a difference for Frosting for the Cause and last week I shared my story and this tutorial with everyone. I haven't had any family members or friends that have been affected with cancer, but I have my own personal story, which you can read there.If you haven’t yet signed up for Frosting for the Cause, I hope you do now.
Burberry Tote Cake Tutorial
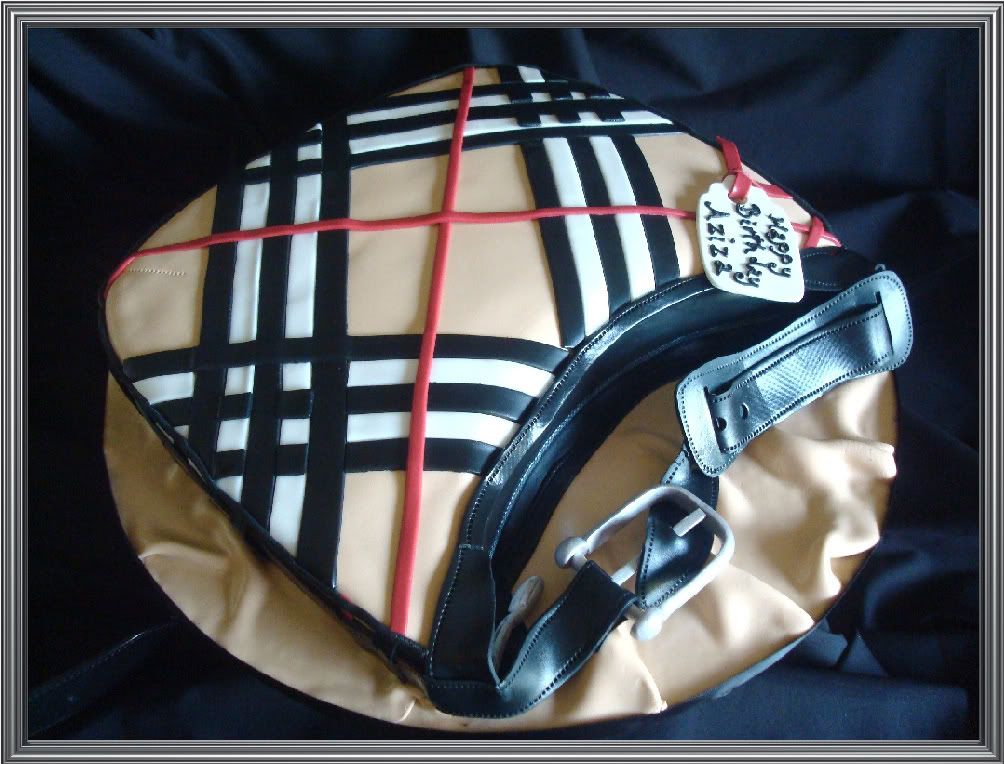
BURBERRY HANDBAG CAKE
Any fashionista will love this cake.Trying to make a purse cake is always difficult because the client is always expecting a replica of the purse they one. I always tell my clients that I am going to make in cake an interpretation of the purse, of course, trying to make it as close as possible to the real one. If you are going to make a purse cake I always recommend, if it is possible, to have the real purse. If your client is not able to provide the purse go online and get as many pictures as you can from the purse in different angles.
Materials:
Cake and frosting
3 pounds of black gumpaste
2 pounds of white gumpaste
6 pounds Ivory fondant
1/2 pound of red fondant
Shortening to use when you work with the fondant
Confectioners sugar for rolling out fondant
Large and small Rolling pin
Plastic mat
Pear luster dust ( if you want to dust details on the cake)
Silver luster dust ( to paint the zipper)
Vodka ( not for you!!! to mix with the silver dust )
2 Cake boards (one to cut a template and other to assemble the cake)
Adjustable multi wheel pastry cutter (optional)
Zipper mold (optional)
Paring knife
Stitching tool
Small paint brush
Fondant smoothers
Small scissors
Tape measure
The buckle:
-Make it 2 weeks before the cake is due
-I used gumpaste,which is a sugar paste in terms of texture but dries as hard as porcelain.Do not substitute fondant for gumpaste, you need the gumpaste to ensure that the details will dry and not crack.
-I hand made flat sausages shapes and 2 flat circles to form the shape of the buckle, I let them dry overnight and then I attached them with a dab of water.
-I let them dry over night again and using silver luster dust mixed with a little bit of Vodka I painted them.
I gave them 2 coats of paint, but once is enough. Then you put the buckle aside and do not touch it until is completely dry, other wise you will get your finger prints on it.

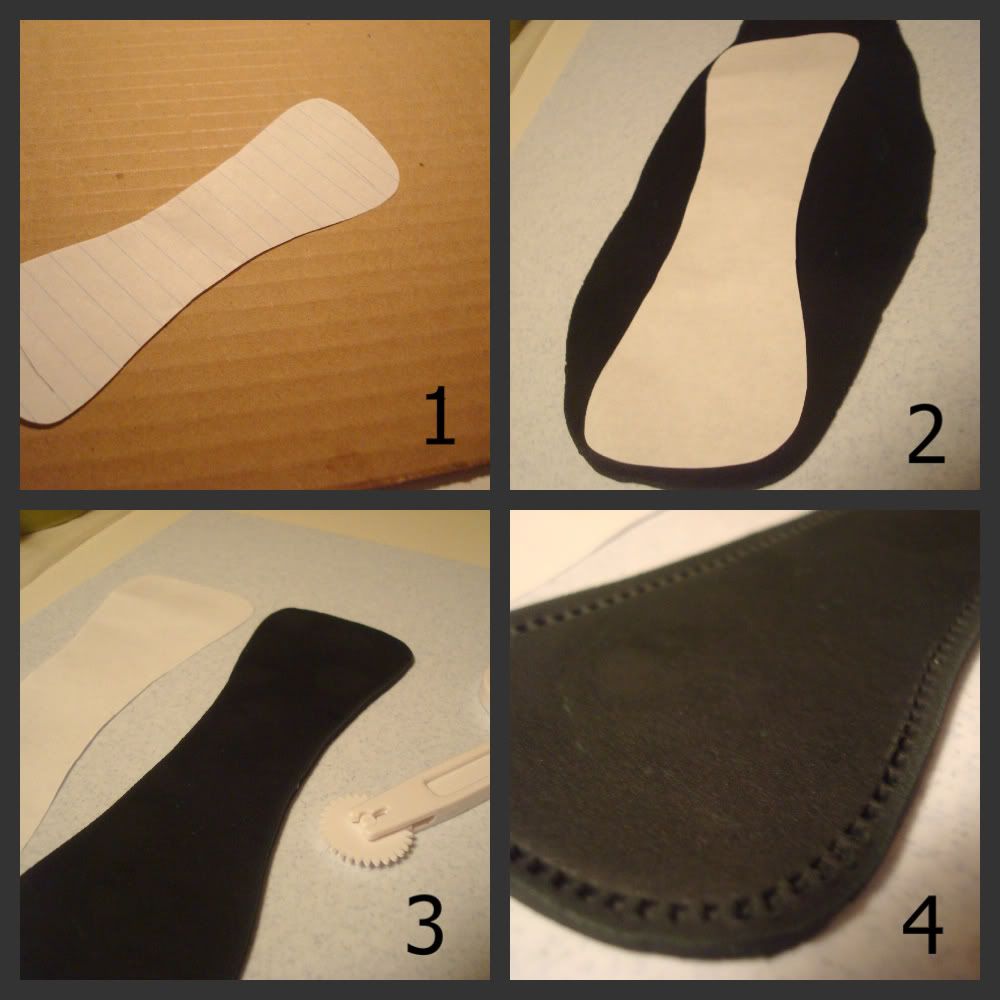
1-Since I had the real purse with me I was able to make a mold for the detail of the handle.
2-On a plastic mat greased with shortening (I do not use confectioners sugar with dark colors) roll out black gumpaste to 1/2 inch thick. Using the pairing knife cut the shape of the mold.
3,4-With the stitching tool or a toothpick make stitch marks along the sides.I did it in both sides.
5- Using a pairing knife make 2 thick cuts in each side ( you are going to need room to insert the long handle there)
6-Put the piece of the handle on top of a piece of paper towel and let it dry for at least 3 days. The side curl in will be in the front when you insert the long handle, you will be doing that when the cake is pretty much done.

The cake:
- Using a cake board I made a template of the cake size and shape that I wanted.
-Bake your favorite cake recipe on a cake sheet pan
-Make the buttercream.
-Place the template on top of your cake and using a sharp knife cut around it.
-Place the shape cake on the cake board template using a little buttercream as "glue" and fill the layers with buttercream. ( I made mine 3 layers of cake and 2 layers of buttercream). At this point crumb coat the cake and put it in the refrigerator. Wait 30 minutes, get the cake out and ice the cake nice and smooth and put it back in the refrigerator.
-Use a tape measure for measuring the curved surfaces of the cake.
-It is very important to make sure your cake is smooth and cold before you cover it with the fondant.

Covering the cake in fondant:
-Put the cake on a bigger cake board and attach it using royal icing
-I like to brush my cakes with a little syrup to help the fondant stick to it.
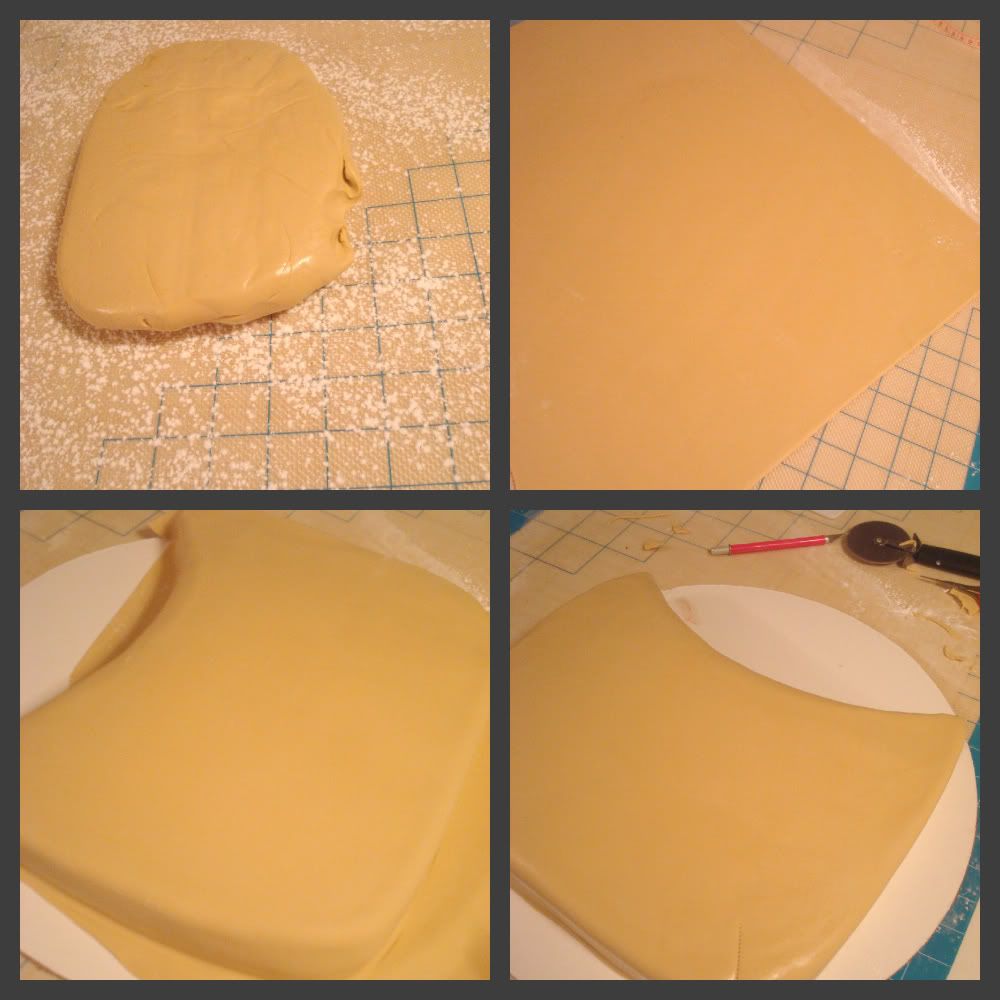
-If you have to color white fondant use a toothpick to add a tiny dab of Ivory paste coloring directly to it. Start with a small amount of color and knead the fondant until the coloring is completely worked through, add more color if you need until you get the color you want.
-Dust your work surface with confectioners sugar and roll the fondant until is about 1/8 inch thick, make sure the fondant is larger than the total cake measurement.
-Pick up the fondant by rolling it onto the rolling pin and cover the cake. Run the fondant smoothers over the top of the cake to make sure there are no air bubbles and secure the edges along the sides of the cake.
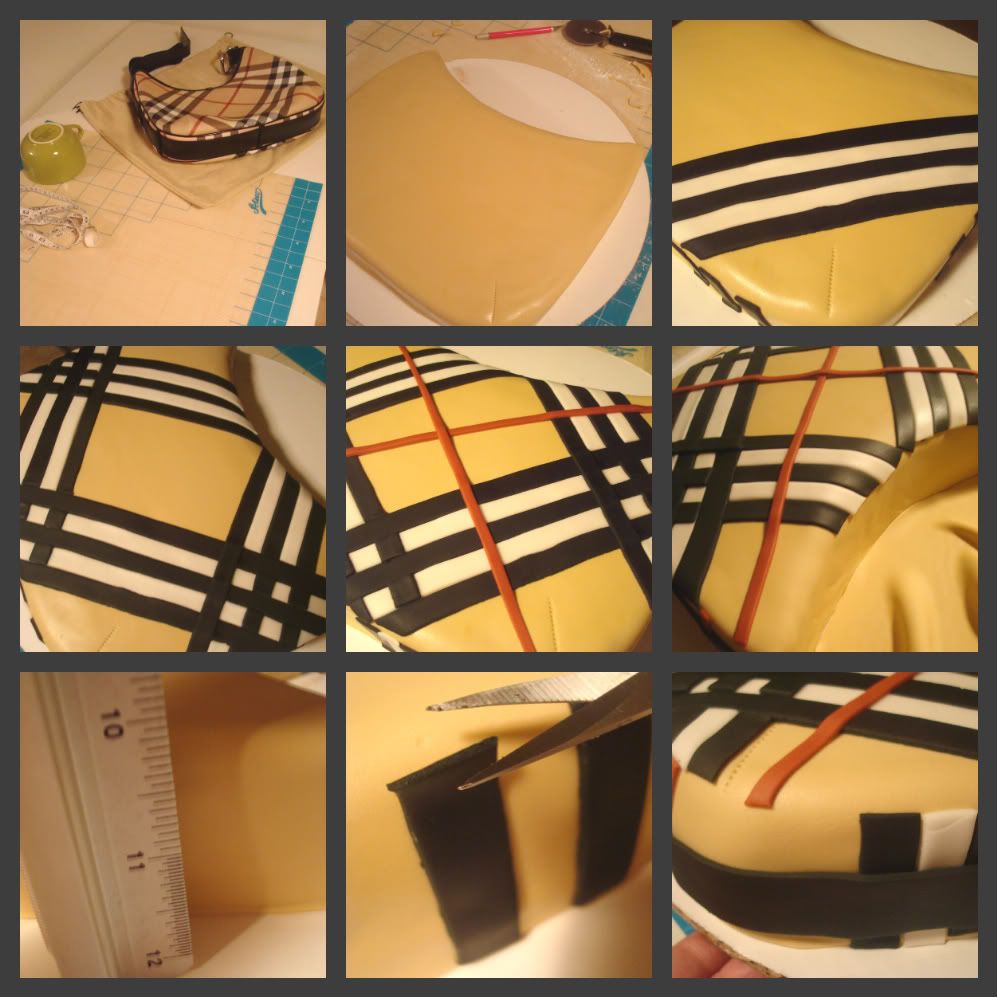
To make the plaid on the cake:
The best way to make the plaid on the cake is using a multi wheel pastry cutter, I got mine at NY Cake at a very good price and I love it. You can always use a ruler to cut the stripes (I used to do that )but it is very time consuming.
-Get the black, red and white fondant ready, I used the soup cups to cover the fondant so it doesn't get dry while I am working with different colors at the same time.
-I made all the stripes for the plaid at the same time, I cover them with plastic wrap ( to avoid drying)

-I kept the real purse close to me when I started making the plaid design, you also can use pictures from different angles of the purse. The idea is to make the plaid as close as the real one as possible.
Making the details of the cake:
- For the zipper I used a mold and cut a 2 inch wide long strip (as long as the handbag) and attached it with a dab of water to the cake.I painted the zipper with silver luster dust mixed with vodka to create a metallic look.If you do not have a mold, just use the stitching tool to make the zipper detail.
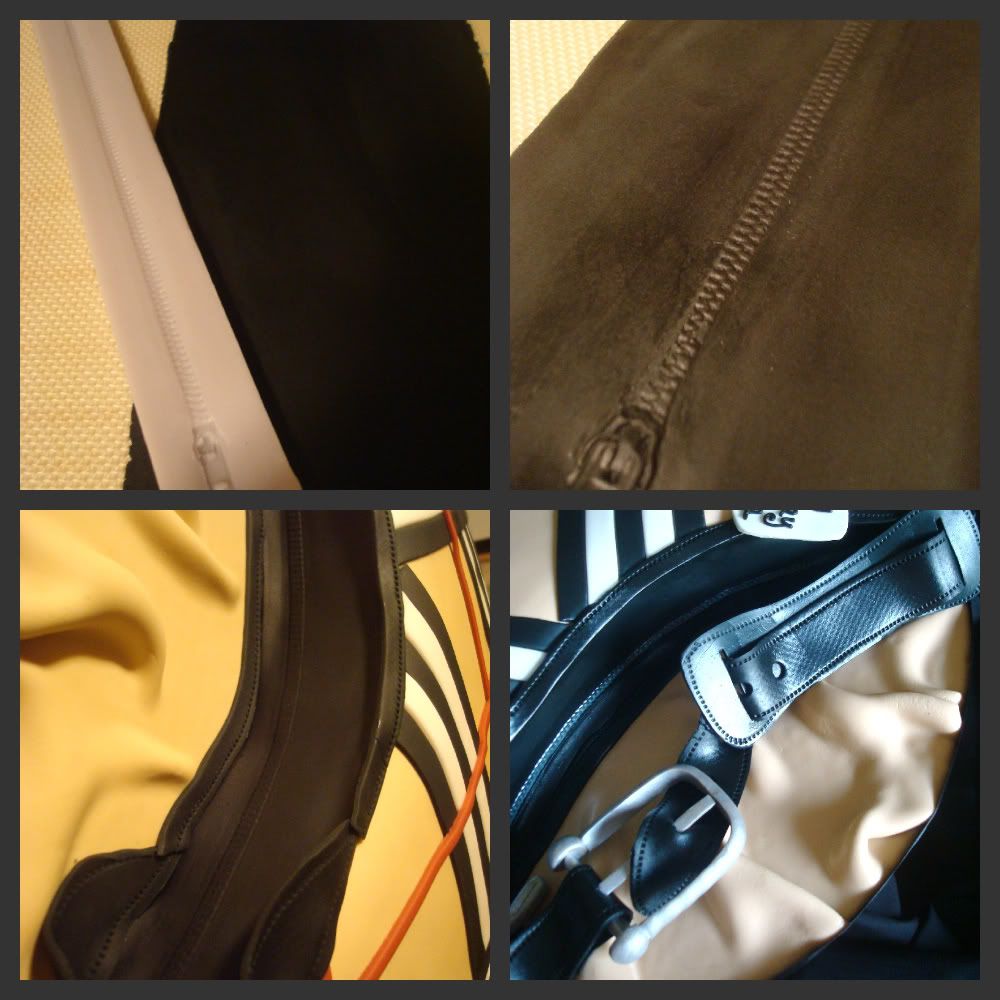
-Measure the sides of the cake to determinate the size of the handle that you are going to need.
-Cut the long strip ( handle), make the stitching details and attach to the sides of the cake with a dab of water. Remember that you have to assemble the front of the handle with the piece that you previously made and also attach the buckle to the 'other side" of the handle..
Look at the pictures of the real purse or the purse itself and make any other details that you might need.
-To make the tag I used a tag cookie cutter. I piped the letters with royal icing
-Take what ever is left of the ivory fondant and roll it as thin as you can and cover the board around the cake.
-At the end, using a glue gun you can add ribbon around the cake board.
Now go and take a Tylenol, at this point you will feel like your back is breaking in pieces!


0 comments:
Post a Comment