

After baking a batch of Oreo Cream Cheese Buns, I was left with half a block of cream cheese. Not knowing what to do with the leftovers, I tried googling for a suitable recipe to use it. I searched using the keywords "125g cream cheese", nothing interesting or suitable came up. I then tried googling in Chinese, "125g 奶油芝士" and this recipe popped right up.

The blog post with the title "125g的奶油芝士也能做出香浓的日式轻芝士蛋糕" caught my attention immediately. This is exactly what I am looking for...to use only 125g cream cheese to make a Japanese Soufflé Cheesecake!

I didn't have much luck with Japanese style cotton soft cheesecake on my previous attempt, once out of the oven, it sank, shrank and developed a 'waist' despite leaving the cake to cool in the oven before unmoudling. However, after my successful attempt at making the 3 ingredients Japanese Soufflé Cheesecake, my confidence level went up :)

I adapted the original recipe a little just to round off the ingredients amount. I baked the cake at 150degC for 60mins. The cake rose nicely and the top was baked to a beautiful golden hue without me having to adjust the temperature or to tent the top with foil. The cake was able to hold the structure so well probably because of the number of egg whites used and the relatively higher amount of flour. This is the first time I baked something using 5 whole eggs, I was actually a little overwhelmed with the shear amount of egg whites that was being whipped up!

Instead of leaving the cake to cool in the oven, I removed it immediately once the baking time was up. Once out of the oven, I dropped the cake pan at a height onto my kitchen counter top (I used a cork mat to protect the counter top). I read that this action helps to get rid of the hot air inside the cake quickly so that the cake will not sink or shrink too much (this also applies to chiffon cakes and bread loaves). I removed the cake from the pan right after as I didn't want it to cool off inside the pan. For me, it is best to remove the cake from the pan while it is still hot, as upon cooling, the top of the cake (the papery thin golden crust) will stick to anything that comes into contact, be it my fingers or a plate. The cake pan and the cake itself was very hot, making it a little tricky to unmold especially I had used a cake pan with a fixed base. I had to invert the cake twice so that I could remove the baking paper on the sides and bottom, before leaving it to cool right side up on the cooling rack. It would be easier if I were to use a pan with a removable base. However, as the cake is baked using the water bath method, even if the pan is wrapped with foil, somehow water condensation may still occur, leaving the bottom of the cake dense and wet.
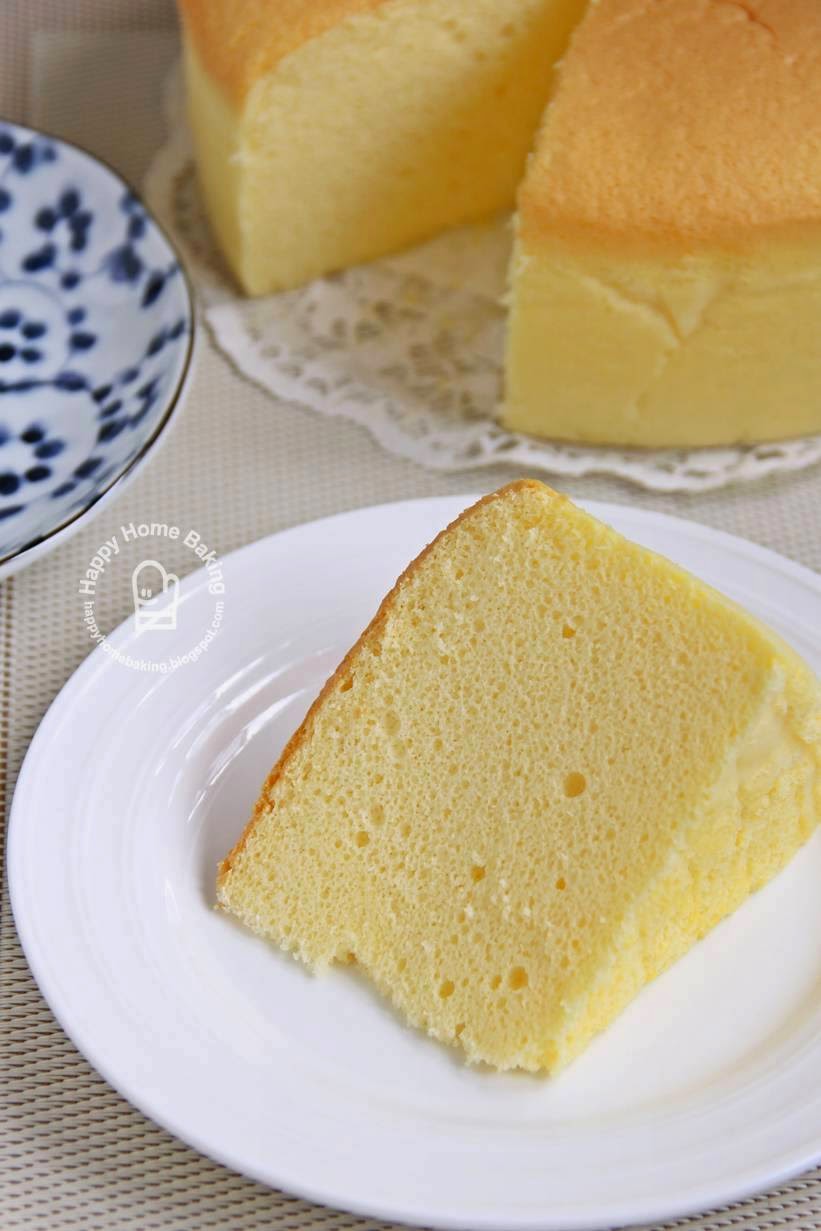
This cake is a lighter version of the usual Japanese soufflé cheesecake, the texture was soft and moist, something we could eat one slice after another without having to feel too guilty. Do give this a try if you ever run out of idea what to do with half a block of cream cheese. I feel that this is quite a fool proof recipe especially so if you are good in making chiffon cakes but no luck with Japanese soufflé cheesecake.
Happy Baking!
Japanese Soufflé Cheesecake 日式舒芙蕾芝士蛋糕
Ingredients:
(makes one 8" cake)
125g cream cheese, cut into cubes
60g unsalted butter, cut into cubes
5 egg yolks (I used eggs with net weight of 55g)
125g milk
1 teaspoon lemon juice
75g cake flour
35g corn flour
5 egg whites (I used eggs with net weight of 55g)
120g caster sugar
1/2 teaspoon lemon juice
Method:
- Line the base and sides of a 8" round cake pan(fixed base) with parchment paper. For the sides, make sure the parchment paper extends higher than the cake pan by about 1.5 inches as the cake will expand and rise above the rim of the pan, set aside.
- Sieve together cake flour and corn flour, set aside.
- Place cream cheese and butter in a large mixing bowl. Set the mixing bowl over a saucepan of simmering water (make sure the mixing bowl is bigger than the sauce pan). Let the mixture melts and stir till smooth. (Note: not to worry if the butter and cheese mixture appears curdled/separated, after the egg yolks are added in it will turn smooth). Remove from heat and leave to cool.
- When ready, add the egg yolks to the cream cheese and butter mixture, one at a time, and with a balloon whisk, whisk to combine.
- Add milk, whisk to combine. Add lemon juice, whisk to combine.
- Sieve over the flour mixture, whisk to combine. Small lumps may form once the flour is added, whisk the batter gently till there are no lumps, do not over mix.
- In a clean, dry mixing bowl, beat egg whites and lemon juice with an electric mixer on low speed until mixture becomes frothy and foamy. Add half of the sugar and turn to medium-high speed and beat the mixture. Continue to add in the remaining sugar mixture in separate additions and beat until the egg whites reaches the soft peak stage.The soft peak stage is reached when the peaks of the whites curl over and droop slightly. Turn to low speed and beat for another 1 to 2 mins (this helps to stabilise the air bubbles).
- Add the beaten egg whites to the cream cheese mixture in 3 separate additions, each time fold with a rubber spatula (I prefer to use a balloon whisk) until just blended.
- Pour batter into the prepared cake pan. Tap the pan lightly on a table top to get rid of any trapped air bubbles in the batter.
- Place cake pan in a baking tray. Fill the baking tray with hot water (the water should rise up to about 1 inch of the cake pan).
- Place on lower rack of the oven and bake at 150 degC for 60 mins.
- Remove cake pan from oven and immediately drop the pan at a height of 20~30cm onto the table top. This helps to prevent the cake from shrinking upon cooling. Unmould the cake immediately. To unmold, place a large plate or baking sheet on top of the cake pan, invert the cake pan onto the plate/baking sheet. Remove the cake pan and the parchment paper on the base and sides of the cake (Note: do use oven mitten as the cake pan will be very hot). Next, place a cooling rack on the base of the cake, invert the cake right side up onto the cooling rack and leave to cool completely. Leave the cake to chill in the fridge for about 2 to 3 hours, best overnight, before serving.


0 comments:
Post a Comment