The 2009 October Daring Bakers’ challenge was brought to us by Ami S. She chose macarons from Claudia Fleming’s The Last Course: The Desserts of Gramercy Tavern as the challenge recipe.
I've gotta tell you my eyes nearly popped out of my head when I saw what this months challenge was. It was a freaky coincidence that I had just recently attempted macarons for the first time and my confidence was so boosted by that initial success that I had been planning to attempt them again the very weekend that this challenge came out. I had been saving this flavour idea for when I was more experienced, but I took this as a sign that I should just leap in head first and attempt my crazy idea. Now keep an open mind about this, it might sound extremely weird but trust me, it tastes so amazing. Ice kacang (or ais kacang) is a fabulous Malaysian dessert made of shaved ice, thick and bright pink rose syrup, creamed sweetcorn, evaporated milk and other extra sweet things such as grass jelly and palm seeds. It's wonderfully sweet and refreshing and the perfect dessert for the humid Malaysian weather.
I realised afterwards that my first two Daring Bakers' challenges have been Malaysian-themed, but I had to do this flavour! It turned out to be a fairly traumatic and exhausting experience getting these right. First of all, I had serious issues with the recipe we were meant to use for this challenge. There just seemed to be too much egg white for the amount of dry ingredients, and the amount of sugar we had to beat into the egg whites seemed dangerously small. I attempted the recipe twice with the exact measurements given in the DB recipe and both times were EPIC failures. They were bubbly and cracked without the slightest hint of feet. Wasting 10 egg whites like that was pretty upsetting and I was ready to give up on the whole thing but I decided to give it one last go. I adjusted the ratios so there was more granulated sugar and more dry ingredients (and less egg whites in case it failed again!). And hurrah it worked! I was dancing madly around my kitchen doing what is now known as the 'feet dance', because right in front of my eyes were smooth pink macaron shells with FEET!
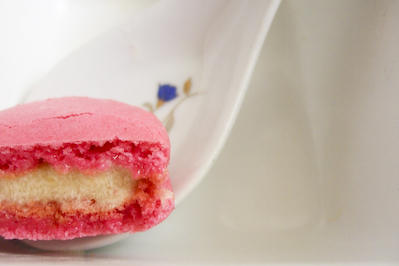
I still did a couple more batches after that, tweaking it here and there to get the right colour and flavour. It was really difficult to get the rose syrup flavour into the macarons, unlike rose water it is a very subtle rose flavour and I didn't want to add too much of it to the meringue because it would upset the water balance. I ended up having to spread the rose syrup out on a tray and baked it in my cool oven to evaporate some of the water from the syrup before adding it to the meringue. But it was worth the effort, the biscuits had that distinctive sweet rose syrup flavour infused into it, without being overpowered by the flavour of the almond meal. Note: Rose Syrup is NOT the same as rose water. Rose water is clear and has a much more concentrated floral flavour, while rose syrup is like red cordial with a hint of rose flavour. I also wanted that really vibrant pink colour that you see in the rose syrup, so I was lucky to get my hands on some pink powdered colouring. Though I may have added a tad too much, I freaked out a little when I saw how bright pink it went! But it seemed fitting in the end, and I really loved the final look of them.
Then, disaster struck. I had just dumped my final shots of my macarons off my camera onto my laptop, only to have the hard drive crash before I had a chance to upload them. After several painstaking hours attempting to recover those photos off my drive, I was left with corrupted jpg files that I could preview, but couldn't actually open. It was cruel and torturous, I could see them but I couldn't touch them! So I had no choice but to try making them again at the last minute. Unfortunately my last batch (third photo) were not quite as pretty as the ones from before (first photo), so I was feeling quite defeated. I think it will be a long time before I make this flavour again, as delicious as it is, after making 5 or so batches I'm totally sick of eating them! My boyfriend and workmates didn't mind though, A enjoyed the sweetcorn buttercream so much that he was eating it straight out of the mixing bowl. And all my workmates who hadn't tried sweetcorn in a dessert before totally loved them.
You're also probably wondering how I was able to complete this challenge with my nut allergy. Lucky for me I realised not long ago that I could get away with eating a few macarons without having any reactions, it seems that my allergy to almond meal is very mild. Such a relief! Anyway, I'll give you the original recipe as it was meant for the DB challenge, but I'll also include any adjustments I made during my tweaking so what you chose to use is up to you. I found Syrup and Tang's macaron articles were total life savers when it came to figuring out what I was doing right and wrong with my macarons.
Ice Kacang Macarons (aka Rose & Sweet Corn Macarons)
(adapted from Claudia Fleming's The Last Course: The Desserts of Gramercy Tavern)
Original Ingredients:
Confectioners’ (Icing) sugar: 2 ¼ cups (225 g, 8 oz.)
Almond flour: 2 cups (190 g, 6.7 oz.)
Granulated sugar: 2 tablespoons (25 g , .88 oz.)
Egg whites: 5 (Have at room temperature)
I used:
205g Icing sugar (blitzed in a food processor to remove any lumps)
120g Almond meal (spread out on a oven tray and dried out in a cool oven for 10 mins)
50g granulated sugar
3 large egg whites (aged in the fridge for 48 hours, approx 100g)
1/8 tsp pink powdered food colouring
1 tablespoon rose syrup (spread out on a pyrex plate and baked in a cool oven for 5 mins then cooled until thick, this is not the same as rose water!)
Directions:
1. Preheat the oven to 200°F (93°C). Combine the confectioners’ sugar and almond flour in a medium bowl. If grinding your own nuts, combine nuts and a cup of confectioners’ sugar in the bowl of a food processor and grind until nuts are very fine and powdery.
2. Beat the egg whites in the clean dry bowl of a stand mixer until they hold soft peaks. Slowly add the granulated sugar and beat until the mixture holds stiff peaks. (Right before the mixture reached stiff peaks I added my food colouring and concentrated rose syrup to the mixture)
3. Sift a third of the almond flour mixture into the meringue and fold gently to combine. If you are planning on adding zest or other flavorings to the batter, now is the time. Sift in the remaining almond flour in two batches. Be gentle! Don’t overfold, but fully incorporate your ingredients. (This was the most critical part of the recipe for me. I was NOT gentle, but instead really beat the air out of the mixture as I incorporated the almond meal. If I didn't I found the mixture turned out really bubbly and without feet. It's really important to know when to stop mixing, and even in my last batch I underbeat my mixture because I'm still super scared about over mixing. For me the mixture was ready when I could drip a line of mixture onto the top of the rest of the mixture and it would disappear after a minute.)
4. Spoon the mixture into a pastry bag fitted with a plain half-inch tip (Ateco #806). You can also use a Ziploc bag with a corner cut off. It’s easiest to fill your bag if you stand it up in a tall glass and fold the top down before spooning in the batter.
5. Pipe one-inch-sized (2.5 cm) mounds of batter onto baking sheets lined with nonstick liners (or parchment paper).
6. Bake the macaron for 5 minutes. Remove the pan from the oven and raise the temperature to 375°F (190°C). Once the oven is up to temperature, put the pans back in the oven and bake for an additional 7 to 8 minutes, or lightly colored.
7. Cool on a rack before filling.
For the buttercream:
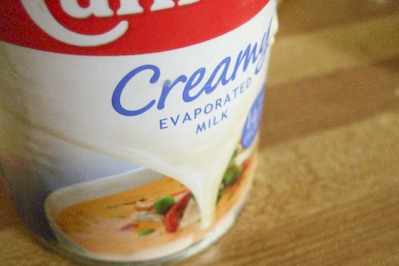
110ml evaporated milk
100g sugar
37g plain flour
112g butter, softened
1/4 cup creamed corn
1/2 cup icing sugar, sifted
Combine the flour and sugar together in a medium saucepan. Gradually pour in evaporated milk, stirring as you go to remove any lumps (using a whisk will make this easy).
Heat this milk mixture over medium low heat until it almost comes to the boil, stirring constantly. Reduce heat to low and continue to stir constantly for several minutes until mixture becomes thick and hard to stir. Allow to cool completely.
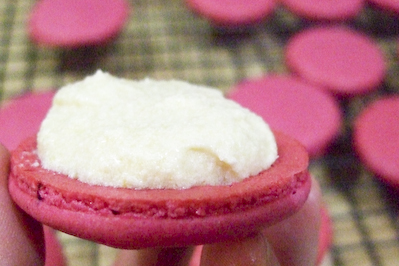
Beat softened butter in a large mixing bowl until it is pale and creamy. Slowly add the milk mixture and continue beating until smooth. Add sweet corn and icing sugar and beat until combined. Take care not to overbeat at this point or the mixture can split. If mixture is still very runny you can add more icing sugar. Allow to cool in the fridge and then spoon mixture onto macaron shells.
I had some serious issues with my last batch of buttercream which I made. The mixture split and was super runny, so the photos I took at the last minute to try and make up for all the great photos I lost were kind of terrible. I really didn't have the energy to try again, so the photos in this post are the best that I could scrounge up from the scraps of photos I managed to recover.

Batch #1: Before I had powdered food colouring
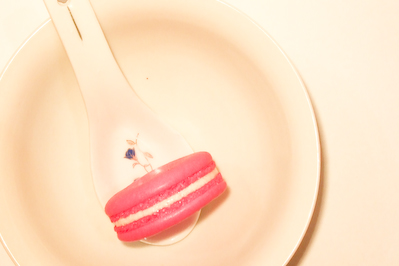
Batch #2: So freakin happy with these.

Batch #3: Last minute panic batch, a little undermixed
In the end, I feel so much more confident about baking macarons. Thank you so much to Ami for choosing it for this month, it really was a great challenge. It pushed me as a baker and I will definitely be experimenting with more flavours and techniques in the future. Plus they were so yummy that I couldn't stop eating them! I am officially obsessed.
I've gotta tell you my eyes nearly popped out of my head when I saw what this months challenge was. It was a freaky coincidence that I had just recently attempted macarons for the first time and my confidence was so boosted by that initial success that I had been planning to attempt them again the very weekend that this challenge came out. I had been saving this flavour idea for when I was more experienced, but I took this as a sign that I should just leap in head first and attempt my crazy idea. Now keep an open mind about this, it might sound extremely weird but trust me, it tastes so amazing. Ice kacang (or ais kacang) is a fabulous Malaysian dessert made of shaved ice, thick and bright pink rose syrup, creamed sweetcorn, evaporated milk and other extra sweet things such as grass jelly and palm seeds. It's wonderfully sweet and refreshing and the perfect dessert for the humid Malaysian weather.
Ice Kacang
Many countries in South East Asian use sweet corn in desserts, ice kacang and sweetcorn ice cream being two of my favourites. But mention it to people who haven't grown up with it and they will usually raise their eyebrows in disbelief. I even remember one person saying, "I can't think of anything except chicken and corn soup when I think of sweet corn. It doesn't belong in a dessert!". But seriously people, don't knock it until you've tried it. The sweetness of the corn really makes it the perfect flavour for a dessert. So here was my idea: A rose syrup flavoured biscuit with a sweet corn and evaporated milk buttercream, et voila - Ice Kacang Macarons!I realised afterwards that my first two Daring Bakers' challenges have been Malaysian-themed, but I had to do this flavour! It turned out to be a fairly traumatic and exhausting experience getting these right. First of all, I had serious issues with the recipe we were meant to use for this challenge. There just seemed to be too much egg white for the amount of dry ingredients, and the amount of sugar we had to beat into the egg whites seemed dangerously small. I attempted the recipe twice with the exact measurements given in the DB recipe and both times were EPIC failures. They were bubbly and cracked without the slightest hint of feet. Wasting 10 egg whites like that was pretty upsetting and I was ready to give up on the whole thing but I decided to give it one last go. I adjusted the ratios so there was more granulated sugar and more dry ingredients (and less egg whites in case it failed again!). And hurrah it worked! I was dancing madly around my kitchen doing what is now known as the 'feet dance', because right in front of my eyes were smooth pink macaron shells with FEET!
I still did a couple more batches after that, tweaking it here and there to get the right colour and flavour. It was really difficult to get the rose syrup flavour into the macarons, unlike rose water it is a very subtle rose flavour and I didn't want to add too much of it to the meringue because it would upset the water balance. I ended up having to spread the rose syrup out on a tray and baked it in my cool oven to evaporate some of the water from the syrup before adding it to the meringue. But it was worth the effort, the biscuits had that distinctive sweet rose syrup flavour infused into it, without being overpowered by the flavour of the almond meal. Note: Rose Syrup is NOT the same as rose water. Rose water is clear and has a much more concentrated floral flavour, while rose syrup is like red cordial with a hint of rose flavour. I also wanted that really vibrant pink colour that you see in the rose syrup, so I was lucky to get my hands on some pink powdered colouring. Though I may have added a tad too much, I freaked out a little when I saw how bright pink it went! But it seemed fitting in the end, and I really loved the final look of them.
Then, disaster struck. I had just dumped my final shots of my macarons off my camera onto my laptop, only to have the hard drive crash before I had a chance to upload them. After several painstaking hours attempting to recover those photos off my drive, I was left with corrupted jpg files that I could preview, but couldn't actually open. It was cruel and torturous, I could see them but I couldn't touch them! So I had no choice but to try making them again at the last minute. Unfortunately my last batch (third photo) were not quite as pretty as the ones from before (first photo), so I was feeling quite defeated. I think it will be a long time before I make this flavour again, as delicious as it is, after making 5 or so batches I'm totally sick of eating them! My boyfriend and workmates didn't mind though, A enjoyed the sweetcorn buttercream so much that he was eating it straight out of the mixing bowl. And all my workmates who hadn't tried sweetcorn in a dessert before totally loved them.
You're also probably wondering how I was able to complete this challenge with my nut allergy. Lucky for me I realised not long ago that I could get away with eating a few macarons without having any reactions, it seems that my allergy to almond meal is very mild. Such a relief! Anyway, I'll give you the original recipe as it was meant for the DB challenge, but I'll also include any adjustments I made during my tweaking so what you chose to use is up to you. I found Syrup and Tang's macaron articles were total life savers when it came to figuring out what I was doing right and wrong with my macarons.
Ice Kacang Macarons (aka Rose & Sweet Corn Macarons)
(adapted from Claudia Fleming's The Last Course: The Desserts of Gramercy Tavern)
Original Ingredients:
Confectioners’ (Icing) sugar: 2 ¼ cups (225 g, 8 oz.)
Almond flour: 2 cups (190 g, 6.7 oz.)
Granulated sugar: 2 tablespoons (25 g , .88 oz.)
Egg whites: 5 (Have at room temperature)
I used:
205g Icing sugar (blitzed in a food processor to remove any lumps)
120g Almond meal (spread out on a oven tray and dried out in a cool oven for 10 mins)
50g granulated sugar
3 large egg whites (aged in the fridge for 48 hours, approx 100g)
1/8 tsp pink powdered food colouring
1 tablespoon rose syrup (spread out on a pyrex plate and baked in a cool oven for 5 mins then cooled until thick, this is not the same as rose water!)
Directions:
1. Preheat the oven to 200°F (93°C). Combine the confectioners’ sugar and almond flour in a medium bowl. If grinding your own nuts, combine nuts and a cup of confectioners’ sugar in the bowl of a food processor and grind until nuts are very fine and powdery.
2. Beat the egg whites in the clean dry bowl of a stand mixer until they hold soft peaks. Slowly add the granulated sugar and beat until the mixture holds stiff peaks. (Right before the mixture reached stiff peaks I added my food colouring and concentrated rose syrup to the mixture)
3. Sift a third of the almond flour mixture into the meringue and fold gently to combine. If you are planning on adding zest or other flavorings to the batter, now is the time. Sift in the remaining almond flour in two batches. Be gentle! Don’t overfold, but fully incorporate your ingredients. (This was the most critical part of the recipe for me. I was NOT gentle, but instead really beat the air out of the mixture as I incorporated the almond meal. If I didn't I found the mixture turned out really bubbly and without feet. It's really important to know when to stop mixing, and even in my last batch I underbeat my mixture because I'm still super scared about over mixing. For me the mixture was ready when I could drip a line of mixture onto the top of the rest of the mixture and it would disappear after a minute.)
4. Spoon the mixture into a pastry bag fitted with a plain half-inch tip (Ateco #806). You can also use a Ziploc bag with a corner cut off. It’s easiest to fill your bag if you stand it up in a tall glass and fold the top down before spooning in the batter.
5. Pipe one-inch-sized (2.5 cm) mounds of batter onto baking sheets lined with nonstick liners (or parchment paper).
6. Bake the macaron for 5 minutes. Remove the pan from the oven and raise the temperature to 375°F (190°C). Once the oven is up to temperature, put the pans back in the oven and bake for an additional 7 to 8 minutes, or lightly colored.
7. Cool on a rack before filling.
For the buttercream:
110ml evaporated milk
100g sugar
37g plain flour
112g butter, softened
1/4 cup creamed corn
1/2 cup icing sugar, sifted
Combine the flour and sugar together in a medium saucepan. Gradually pour in evaporated milk, stirring as you go to remove any lumps (using a whisk will make this easy).
Heat this milk mixture over medium low heat until it almost comes to the boil, stirring constantly. Reduce heat to low and continue to stir constantly for several minutes until mixture becomes thick and hard to stir. Allow to cool completely.
Beat softened butter in a large mixing bowl until it is pale and creamy. Slowly add the milk mixture and continue beating until smooth. Add sweet corn and icing sugar and beat until combined. Take care not to overbeat at this point or the mixture can split. If mixture is still very runny you can add more icing sugar. Allow to cool in the fridge and then spoon mixture onto macaron shells.
I had some serious issues with my last batch of buttercream which I made. The mixture split and was super runny, so the photos I took at the last minute to try and make up for all the great photos I lost were kind of terrible. I really didn't have the energy to try again, so the photos in this post are the best that I could scrounge up from the scraps of photos I managed to recover.

Batch #1: Before I had powdered food colouring

Batch #2: So freakin happy with these.

Batch #3: Last minute panic batch, a little undermixed








0 comments:
Post a Comment