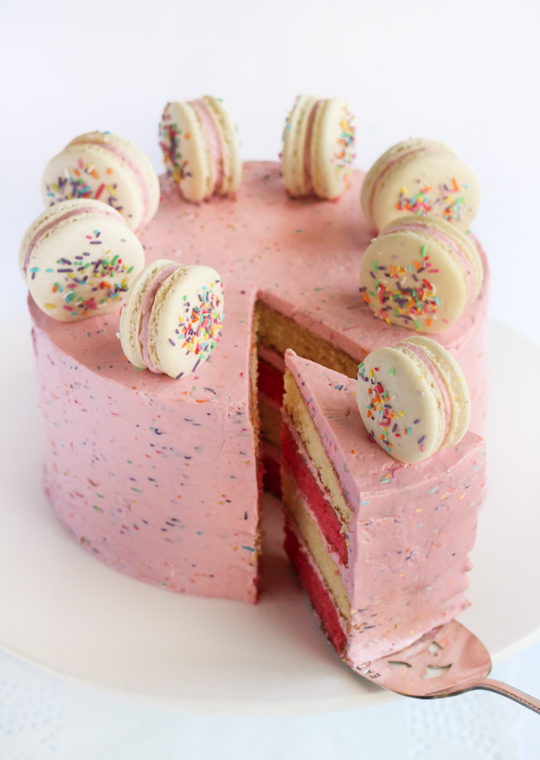
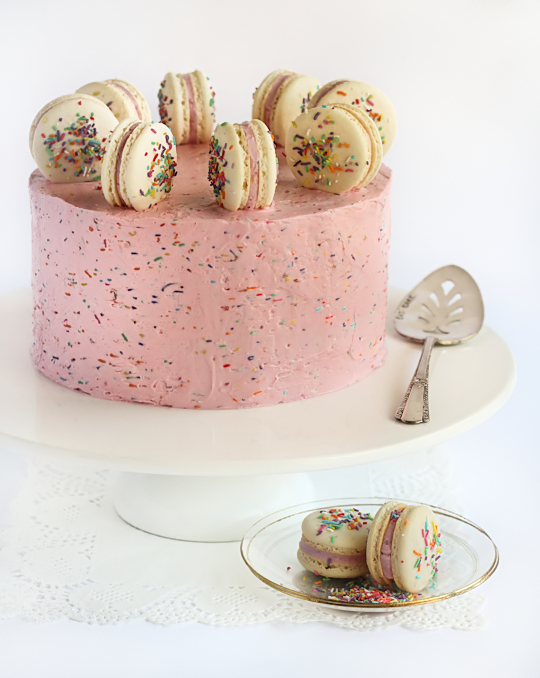
Happy 2013 everyone!!! It's a brand new year, can you believe it? It felt like 2012 went by so ridiculously fast. To start the new year I made a cake for my brother and sister-in-law to celebrate their soon to be born baby (we're still waiting impatiently for her to show up!). Since we know it's going to be a girl I decided to go crazy with the pink and the sprinkles. You can't go wrong with lots and lots of sprinkles.
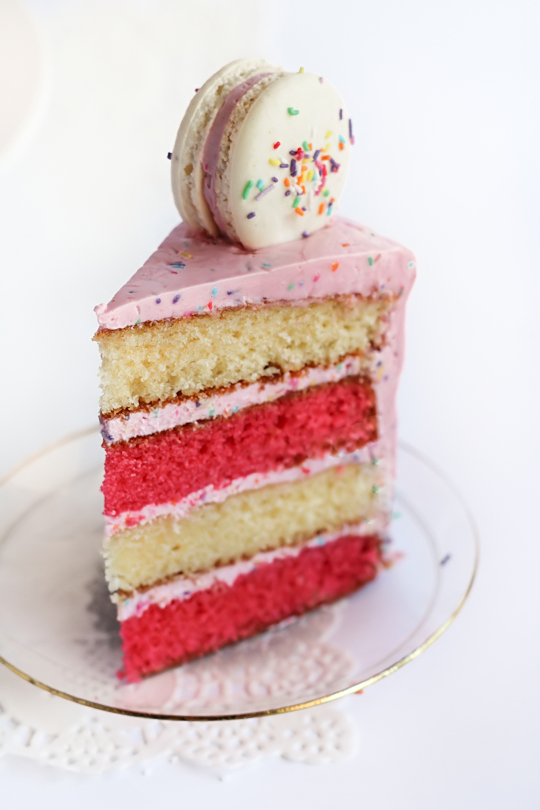
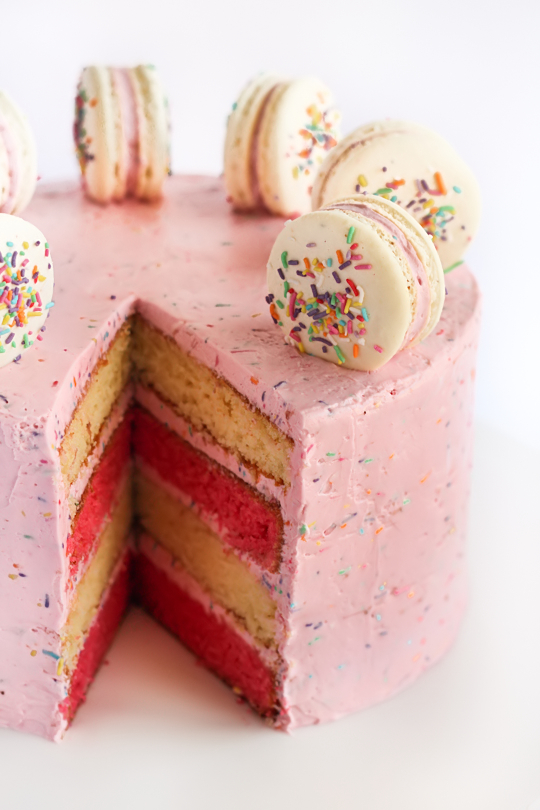
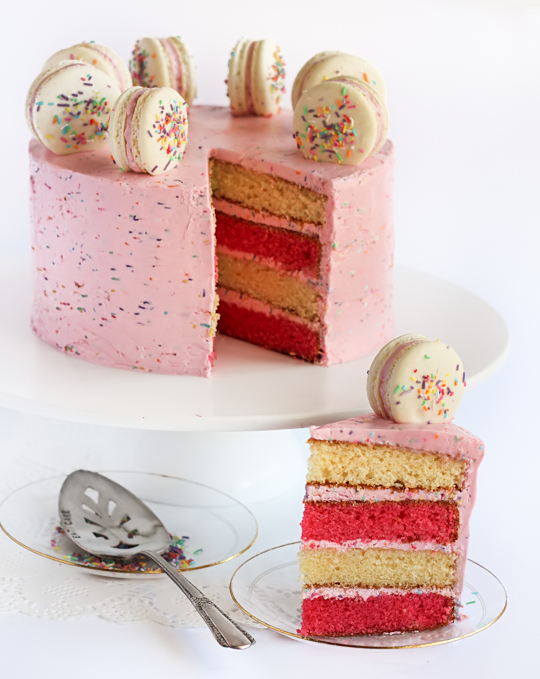
I made my usual trusty yellow cake for the four cake layers, adding a tiny bit of strawberry flavouring and pink food colouring to half the cake batter. I've done ombre layered cakes before, and checkerboard cakes, but I thought this time I would try making it pink and white striped. It's easier and it still has a striking appearance.
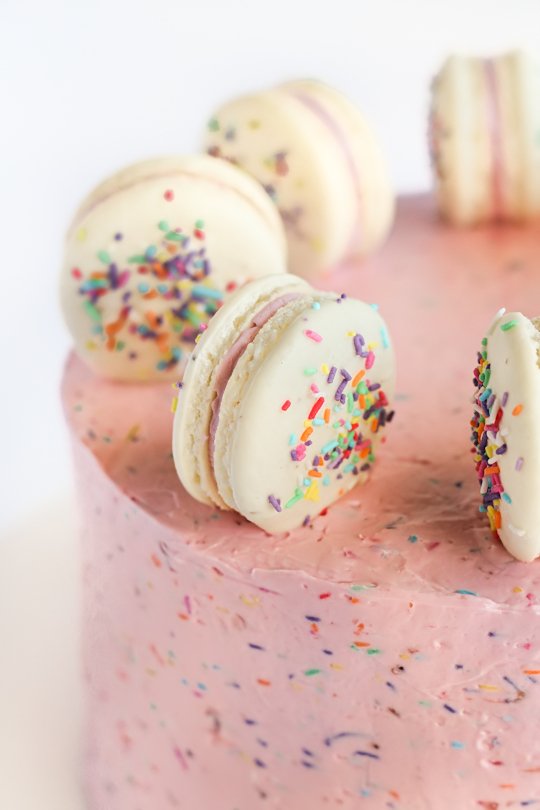
For the icing I made a Swiss meringue buttercream, flavoured with strawberry jam and mixed with a ton of rainbow sprinkles to make it a funfetti buttercream. The sprinkles add such a pretty colour to the icing as well as a bit of texture.
I made some plain macarons as a cute cake topper, filled with the same buttercream that I used for the whole cake. On my first attempt I made some teal-coloured macarons but I completely stuffed them up (even after all the practice I've had I can still mess up my macarons all the time). And of course, lots of sprinkles! MOAR SPRINKLES! Happy New Year!
Pink & White Layered Cake with Strawberry Funfetti Buttercream & Macarons
(makes a four-layered 18cm cake, yellow cake recipe adapted from Le Cordon Bleu Complete Cooking Step-by-Step)
355g (approx 2 & 2/3 cups) plain flour
1 tbsp baking powder
1/2 tsp salt
225ml (about 1 cup minus 1 tbsp) milk
2 tsp pure vanilla extract
400g (approx 1 & 2/3 cups) white sugar (I used caster/superfine)
225g (approx 2 sticks) unsalted butter, softened
4 medium eggs
1 tbsp baking powder
1/2 tsp salt
225ml (about 1 cup minus 1 tbsp) milk
2 tsp pure vanilla extract
400g (approx 1 & 2/3 cups) white sugar (I used caster/superfine)
225g (approx 2 sticks) unsalted butter, softened
4 medium eggs
Optional: 1 tsp strawberry essence + pink food colouring for half the cake
Preheat oven to 180°C (350°F) and grease whatever 18cm (7 inch) round cake tins you have (I only had two so I had to bake it in two rounds, it also works fine with just one tin). You can also use 20cm (8 inch) pans but the layers will be thinner. Line the base of tins with baking paper and grease paper and dust tins with flour. Combine flour, baking powder and salt in a medium bowl and set aside. Mix milk and vanilla together in a measuring jug.
Using an electric mixer on low speed, beat sugar and butter in a large bowl until blended. Increase speed to high and beat for 2 mins or until pale and creamy. Reduce speed to medium low, add eggs 1 at a time, beating well after each addition. Alternately add flour mix and milk mixture, beginning and ending with flour mixture (I did it by adding 1/4 of of the dry mixture followed by 1/3 of the wet mixture at a time). Beat until smooth, occasionaly scraping bowl with a spatula. Divide mixture evenly into 2 medium bowls (I did this by weighing the batter, it ended up being about 700g per bowl for me). Gently fold pink colouring and (optionally) strawberry essence into one bowl. Pour HALF of each bowl of batter into the prepared tins (so you end up with two pink layers and two white layers) bake each layer for about 15-20 minutes or until a skewer into the centre comes out clean and the outside is golden. Cool in tin for 5 mins and then turn out onto wire racks to cool completely. Wrap in clingfilm and chill in the fridge for at least 1 hour or overnight. If your cake layers are slightly domed in the middle you may need to slice a little bit off the top of them to make sure they are flat
Using an electric mixer on low speed, beat sugar and butter in a large bowl until blended. Increase speed to high and beat for 2 mins or until pale and creamy. Reduce speed to medium low, add eggs 1 at a time, beating well after each addition. Alternately add flour mix and milk mixture, beginning and ending with flour mixture (I did it by adding 1/4 of of the dry mixture followed by 1/3 of the wet mixture at a time). Beat until smooth, occasionaly scraping bowl with a spatula. Divide mixture evenly into 2 medium bowls (I did this by weighing the batter, it ended up being about 700g per bowl for me). Gently fold pink colouring and (optionally) strawberry essence into one bowl. Pour HALF of each bowl of batter into the prepared tins (so you end up with two pink layers and two white layers) bake each layer for about 15-20 minutes or until a skewer into the centre comes out clean and the outside is golden. Cool in tin for 5 mins and then turn out onto wire racks to cool completely. Wrap in clingfilm and chill in the fridge for at least 1 hour or overnight. If your cake layers are slightly domed in the middle you may need to slice a little bit off the top of them to make sure they are flat
For the strawberry funfetti buttercream:
(If you're new to making Swiss meringue buttercream, these wonderful tutorials from two of my favourite bloggers will help)
7 large egg whites
1 1/3 cup sugar white sugar (I used caster/superfine)
1 1/3 cup sugar white sugar (I used caster/superfine)
400g butter, room temperature
1/2-2/3 cup strawberry jam, adjust to taste
1/2 cup funfetti/rainbow sprinkles (optional)
To prepare the buttercream, whisk together egg whites and sugar in a large heatproof bowl. Clip a candy thermometer to side of bowl. Set bowl over a pan of simmering water, and whisk until mixture reaches 70°C (160°F) and sugar has dissolved, about 5 minutes.
With a mixer fitted with the whisk attachment, beat egg white mixture on high speed until cooled and thick, about 5 minutes. Reduce speed to medium, and add butter, 1 tablespoon at a time, beating until incorporated after each addition. Add strawberry jam and whip until smooth and thick. If the mixture is runny or splits, don't worry just keep on whipping and it will eventually come together. Buttercream can be refrigerated in an airtight container for up to 3 days; bring to room temperature before using, and beat on low speed until smooth. Stir in sprinkles. Sandwich alternating pink and white layers with about 1/2cm layer of buttercream, then crumb coat the outside of the cake. Cover cake with another layer of icing and smooth with an offset spatula (or go for the easier uneven icing technique if you can't be bothered smoothing it). Make sure to leave at least a cup of buttercream behind if you are filling the macarons with it. To make the macarons, follow the instructions for these plain macarons, but do not add food colouring and pipe simple 3-4cm circles. Top with more rainbow/funfetti sprinkles before baking. Fill baked and cooled macaron shell with the remaining buttercream. Top cake with macarons and refrigerate overnight. Remove from the fridge at least 30 mins before serving.
With a mixer fitted with the whisk attachment, beat egg white mixture on high speed until cooled and thick, about 5 minutes. Reduce speed to medium, and add butter, 1 tablespoon at a time, beating until incorporated after each addition. Add strawberry jam and whip until smooth and thick. If the mixture is runny or splits, don't worry just keep on whipping and it will eventually come together. Buttercream can be refrigerated in an airtight container for up to 3 days; bring to room temperature before using, and beat on low speed until smooth. Stir in sprinkles. Sandwich alternating pink and white layers with about 1/2cm layer of buttercream, then crumb coat the outside of the cake. Cover cake with another layer of icing and smooth with an offset spatula (or go for the easier uneven icing technique if you can't be bothered smoothing it). Make sure to leave at least a cup of buttercream behind if you are filling the macarons with it. To make the macarons, follow the instructions for these plain macarons, but do not add food colouring and pipe simple 3-4cm circles. Top with more rainbow/funfetti sprinkles before baking. Fill baked and cooled macaron shell with the remaining buttercream. Top cake with macarons and refrigerate overnight. Remove from the fridge at least 30 mins before serving.




0 comments:
Post a Comment