
I was in a bit of a pickle this week. I had the task of making a birthday cake for my father-in-law (who is wonderful), and right up until the day before his birthday I had no clue what I was going to make. The last two cakes I made for A's family were the honeycomb crunch checkerboard cake and the pink ombré daisy cake. I didn't want to disappoint. A's dad is a HUGE Arsenal fan, so the obvious suggestion from everyone was to do a Gunners-related cake. But for some reason I wasn't really feeling it this time around. It's been done. Maybe next year...
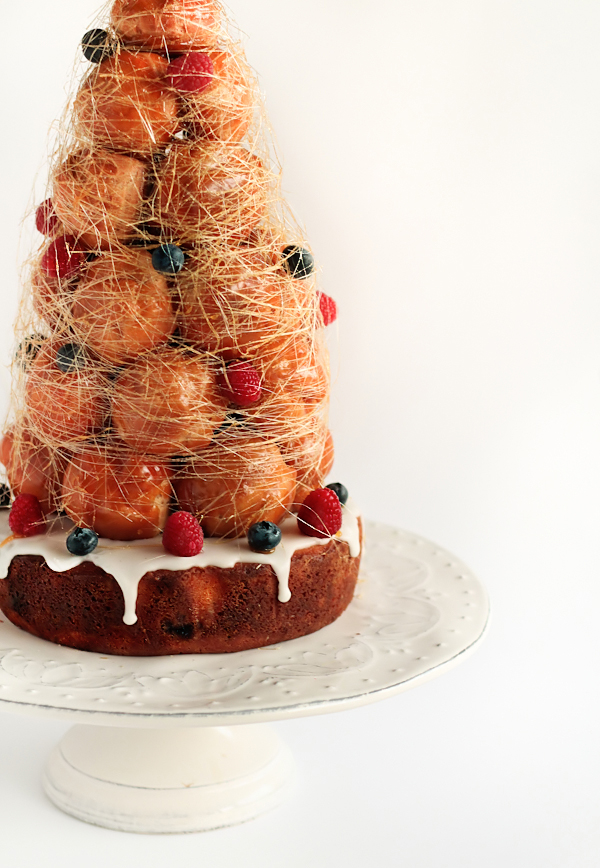
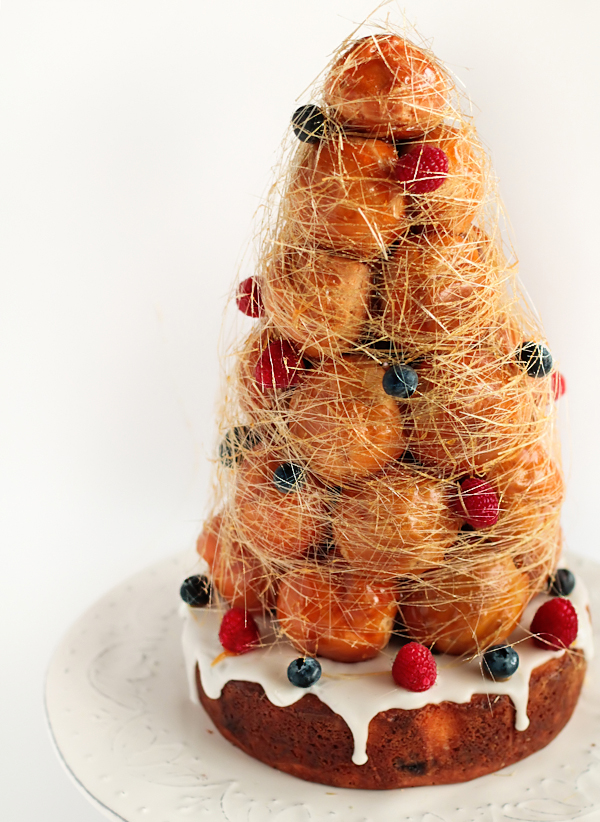
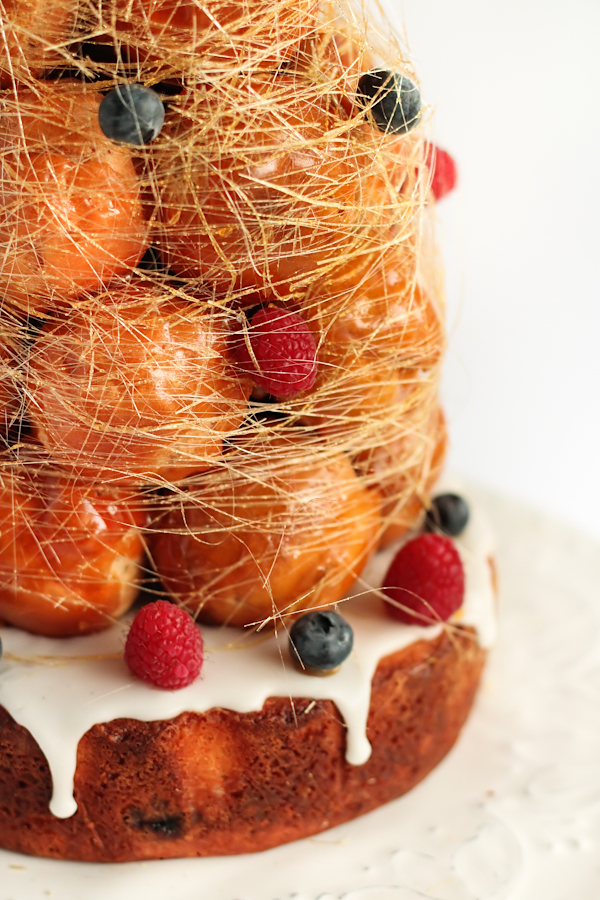
A's Dad mentioned that he loves fresh raspberries and blueberries, so I splashed out and paid a ton for the very out of season fresh berries at the supermarket. Their whole family are big fans of Masterchef Australia, so the night before his birthday I suddenly got all determined to make a damn croquembouche. Don't ask me why I have to call it a damn croquembouche, I don't know why. But in my head I kept thinking, "That's it, I'm going to make a damn croquembouche.". You'd think I had scared myself off with my previous not so good-looking effort, but I guess time heals all sugar burn related wounds. So I made this Lemon Blueberry Cake covered in Lemon Icing topped with a Croquembouche (with raspberry creme patissiere-filled choux pastry/profiteroles).
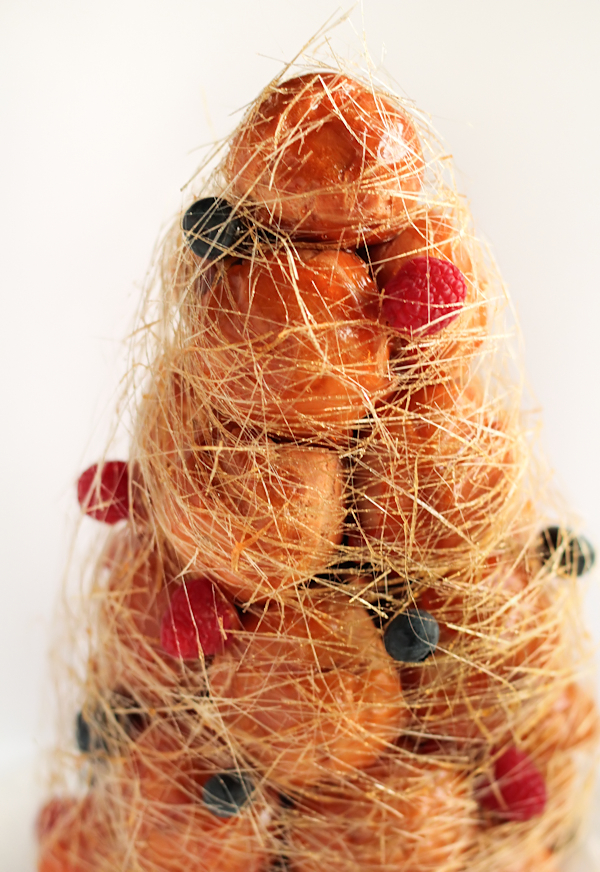
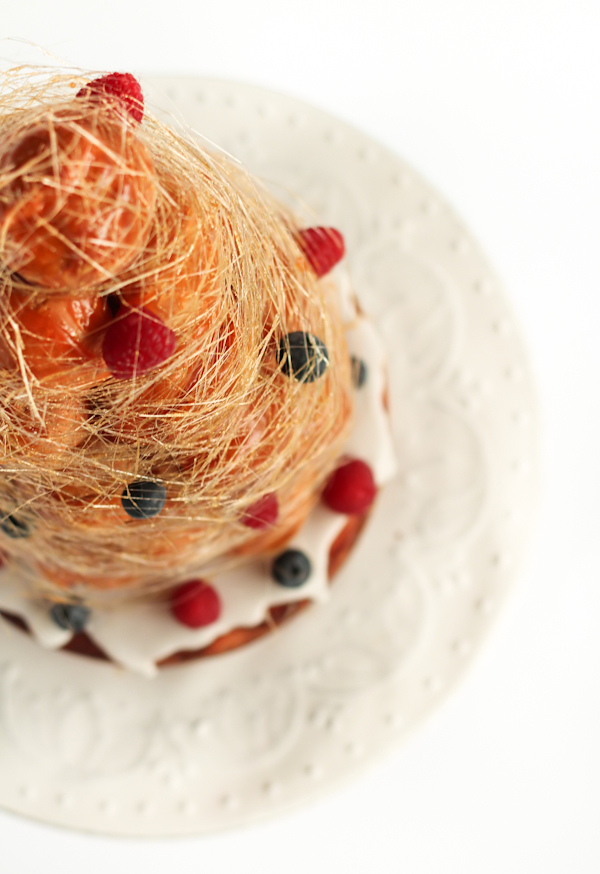
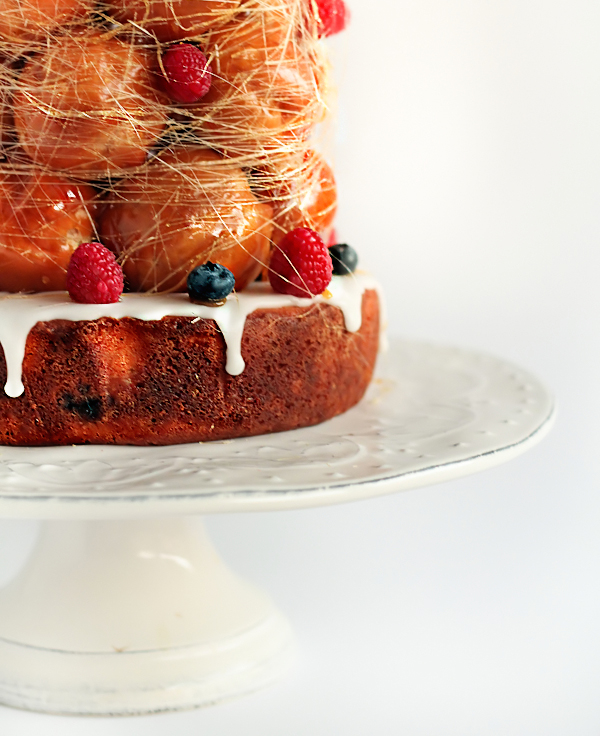
As I mentioned in that previous post, I am not a huge fan of the croquembouche. I will always chose cake over choux pastry. I still remember many years ago being quietly unimpressed to find out that a particular birthday party I was attending would end the night with profiteroles instead of birthday cake. That being said, I loved the challenge of making it and because A's family watch Masterchef I knew they would appreciate the effort that went into it. It wasn't a full-size croquembouche, just big enough to make a rather impressive cake topper. I didn't have one of those fancy metal cones to use as a mould for constructing it, so I had to rely on building it up from the bottom layer up like brickwork and hope that I wouldn't make it too wonky. I was pretty satisfied with the result, but of course suffered a few painful sugar burns in the process. Ouchhh...
It might seem a little random to put cake and pastry together like this, but the flavours worked quite well. The cake is quite small and has a very strong, tangy lemon flavour. It really helped to balance out the intense sweetness from the toffee. Lemon and berries will always work together flavour-wise. And it didn't feel right to have a birthday cake without any cake. I will admit I was pretty pleased with the end result, A pointed out that I had a rather smug smile on my face as we waited at the front door of his family's house that night. It was totally worth all the effort and sugar burns to see their reaction to the cake! P.S. Sorry about the slightly blurry photos, I was racing to get it done before the sun went down!
Croquembouche Cake with Lemon and Berries
(cake adapted from Exclusively Food, croquembouche recipe from here)
For the lemon blueberry cake:
185g (about 3/4 cup) butter, softened (if using unsalted butter, add 1/4 tsp table salt with the butter)
190g (3/4 cup + 5 teaspoons) caster (superfine) sugar (regular white sugar will still work if superfine unavailable)
3 large eggs, at room temperature
1 tsp finely grated lemon zest
185g (about 1 1/3 cups) self-raising flour
4 tbsp lemon juice
1/2 punnet (60g) blueberries, fresh or frozen
For the lemon icing:
300g icing sugar (confectioner's sugar)
1-2 tbsp lemon juice
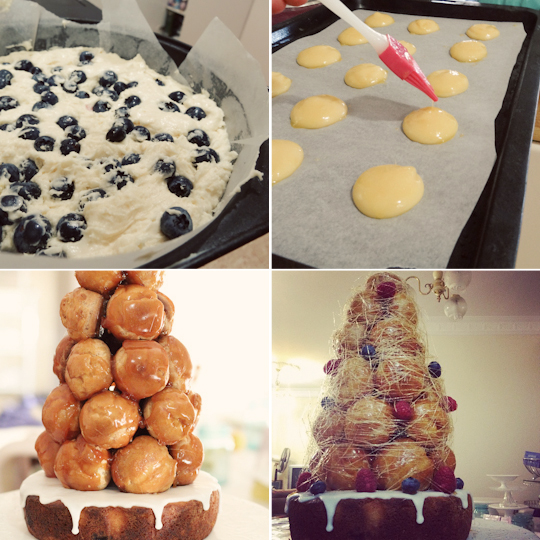
The cake and icing can be prepared a day ahead of the croquembouche and stored in the fridge in an airtight container. Preheat oven to 170°C (340°F). Grease the side and base of a 18cm round cake tin. Line base and side of the pan with non-stick baking paper. Beat butter and sugar in a large mixing bowl with an electric mixer on high until very pale and creamy (at least 10 mins). Add the eggs one at a time, beating for a few minutes after each addition. Don't rush the addition of the eggs as the mixture will be more likely to separate and develop a curdled appearance. Add the zest with the last egg. Add half the flour and stir until just combined. Repeat with remaining flour. Mix in juice. Pour mixture into prepared pan and spread evenly. Sprinkle blueberries evenly over the top of the batter. Bake for about 50-55 minutes, or until a skewer inserted into the centre of the cake comes out clean. The cake should spring back when lightly pressed in the centre. Cool completely in tin on a wire rack.
When cake is completely cool, prepare the icing. Place icing sugar in a mixing bowl and gradually add lemon juice about 1 tsp at a time until the mixture is a smooth, thick white paste (a little thicker than toothpaste). If mixture isn't thick enough it will run right off the edge of the cake and you will need to add more icing sugar. If it is too thick Pour over the top of cake and allow to set.
For the choux pastry:
3/4 cup water
6 tbsp (85g) unsalted butter
1/4 tsp salt
1 tbsp sugar
1 cup (125 g) all-purpose flour
4 large eggs
For the egg wash: 1 egg and pinch of salt
For the raspberry crème patissiere:
2 cups whole milk
4 tbsp cornstarch (cornflour in Aus)
200g (about 1 cup minus 1 tbsp) sugar
2 large eggs
4 large egg yolks
4 tbsp (55 g) unsalted butter
2 tsp pure vanilla extra
1 cup fresh or frozen raspberries (about 150g) - pureed and strained
For the toffee:
2 cups (450 g) sugar
1 tsp lemon juice
For the spun sugar: repeat steps for the toffee but add 1 tbsp glucose syrup at beginning (or light corn syrup)
To decorate: extra fresh berries
Crème patissiere and choux can be made a day ahead as well, just don't fill the choux pastry. Prepare the raspberry crème patissiere; dissolve cornstarch in 1/2 cup of milk. Combine the remaining milk with the sugar in a saucepan; bring to boil; remove from heat. Beat the whole egg, then the yolks into the cornstarch mixture. Pour 1/3 of boiling milk into the egg mixture, whisking constantly so that the eggs do not begin to cook. Return the remaining milk to boil. Pour in the hot egg mixture in a stream, continuing whisking. Continue whisking (this is important – you do not want the eggs to solidify/cook) until the cream thickens and comes to a boil. Remove from heat and beat in the butter, vanilla, and raspberry puree. Pour mixture into a stainless steel/ceramic bowl. Press plastic wrap firmly against the surface. Chill immediately and until ready to use.
For the choux pastry, preheat oven to 220°C (425°F), line two baking sheets with parchment paper. Combine water, butter, salt and sugar in a saucepan over medium heat. Bring to a boil and stir occasionally. At boil, remove from heat and sift in the flour, stirring to combine completely. Return to heat and cook, stirring constantly until the batter dries slightly and begins to pull away from the sides of the pan. Transfer to a bowl and stir with a wooden spoon 1 minute to cool slightly. Add 1 egg. The batter will appear loose and shiny. As you stir, the batter will become dry-looking like lightly buttered mashed potatoes. At this point add in the next egg. Repeat until you have incorporated all the eggs. Transfer batter to a pastry bag fitted with a large open tip. Pipe choux about 1 inch-part in the baking sheets. Choux should be about 1 inch high about 1 inch wide. Using a clean finger dipped in hot water, gently press down on any tips that have formed on the top of choux when piping. You want them to retain their ball shape, but be smoothly curved on top. Brush tops with egg wash (1 egg lightly beaten with pinch of salt). Bake the choux at 220°C (425°F) degrees until well-puffed and turning lightly golden in color, about 10 minutes. Lower the temperature to 180°C (350°F)degrees and continue baking until well-colored and dry, about 20 minutes more. If they start to deflate or still feel soft to the touch when they cool then return them to the oven until they are dry enough. Move to a rack and cool completely. Can be stored in a airtight box in the fridge overnight if you want to make them ahead of time.
When you are ready to assemble your croquembouche, place creme patissiere in a piping bag with a narrow tip. Pierce the bottom of each choux and fill with raspberry creme. Refrigerate filled choux while you prepare the toffee; combine sugar and lemon juice in a saucepan with a silicon spatula stirring until the sugar resembles wet sand. Place on medium heat; heat without stirring until sugar starts to melt around the sides of the pan and the center just begins to smoke. Begin to stir sugar. Continue heating, stirring occasionally until the sugar is a clear, light amber color. Remove from heat immediately as the toffee will continue to brown a bit more while off the heat. Very carefully dip one side of each choux in a thin layer of toffee, letting the excess drip off and then leave to set on a sheet of baking paper. When toffee is set, dip the other side of each choux. If the toffee starts to get too thick, return to very low heat and stir until it is liquid again. Assemble the croquembouche on another sheet of baking paper, using the leftover toffee to stick a ring of about 5-6 choux together to form the base of the cone, the tops of the choux facing outwards. Then stack smaller layers of choux on top until it comes to a point. Carefully place assembled croquembouche on top of iced cake. Make another batch of toffee for the spun sugar, using two forks to spin thin strands of sugar around the croquembouche. Decorate with extra berries. Serve within the same day (toffee will start to melt from the humidity in the air, try to keep in a cool place until ready to serve).


0 comments:
Post a Comment