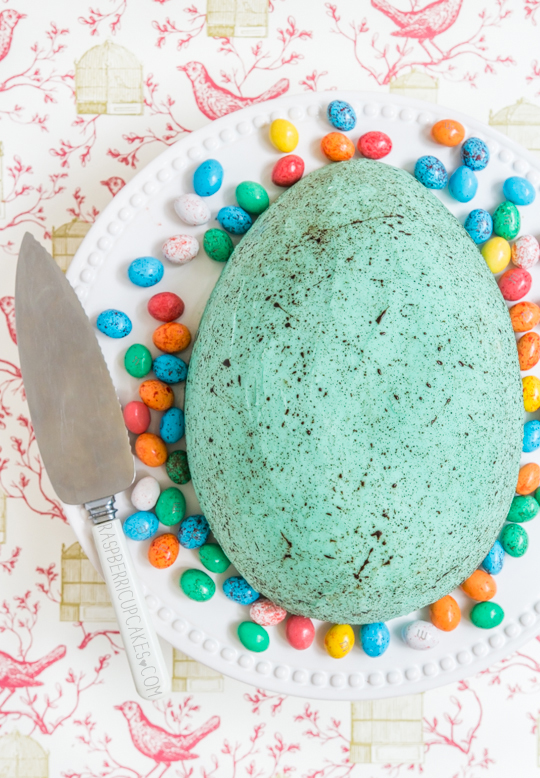
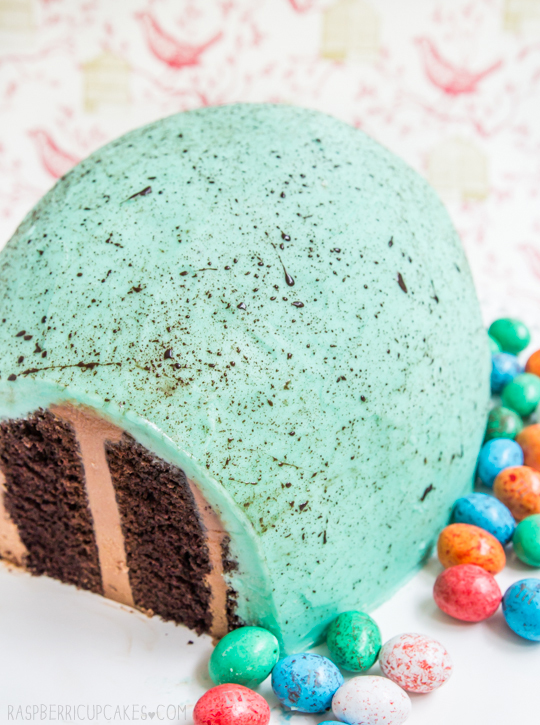
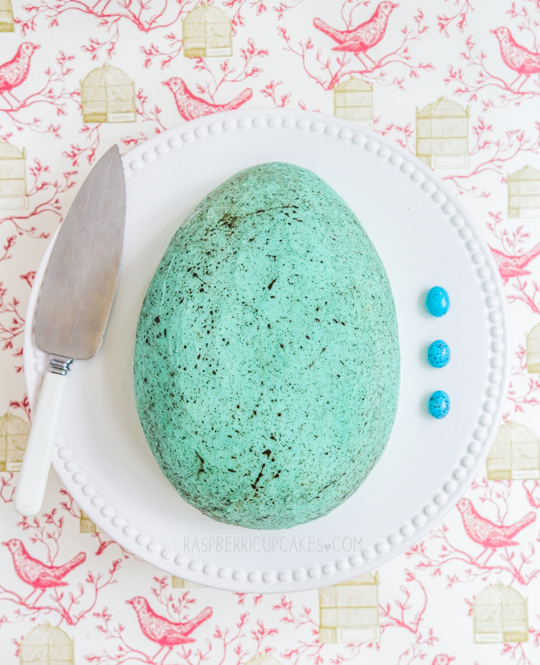
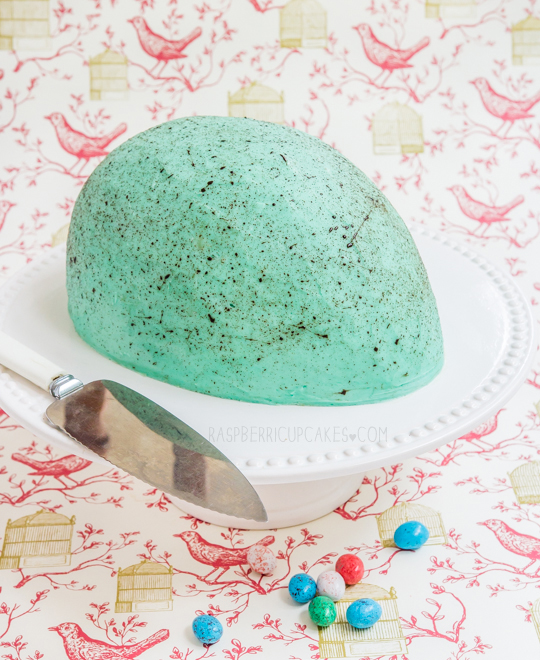
IT'S A GIANT SPECKLED EGG! AND IT'S CAKE! Can I just say again how much I love Easter baking? It gives me an excuse to buy a ton of Easter eggs, and make crazy desserts with them. My house is Easter Egg City right now. I had to buy a huge bucket of speckled crispy M&Ms for these photos and now I get to eat them all muahahahahahahaha. I may have eaten a little too much sugar today.
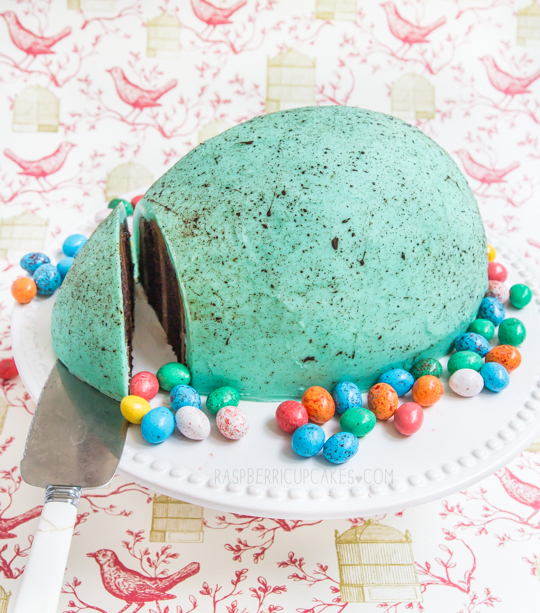
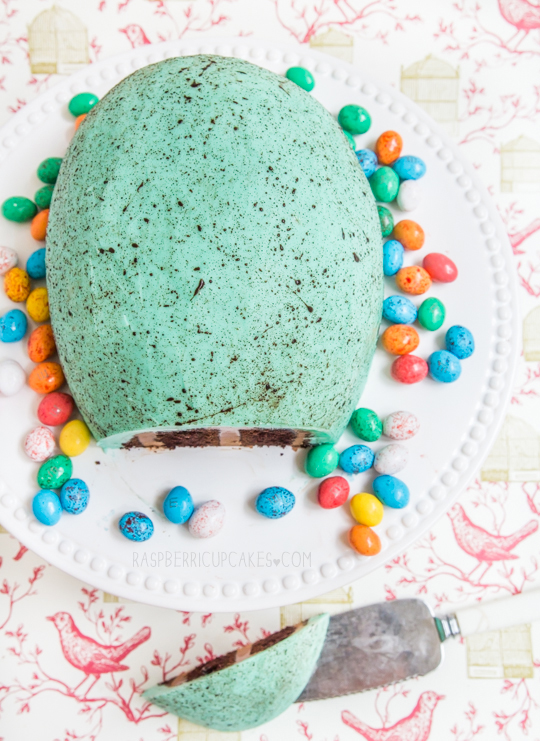
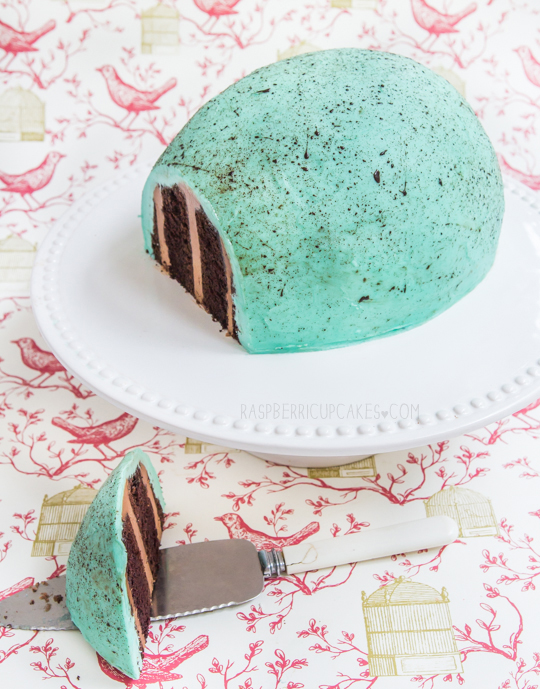
Isn't it glorious? I was 100% inspired by this amazing speckled egg cake on The Cake Blog that is so beautiful and perfect. I wanted to re-use the speckle technique but I tried it on an actual egg-shaped cake, based on this pin of a recipe from the 1950s that is AWESOME. My speckling technique is obviously nowhere near as good as the original cake, but it will have to do. Added bonus; the inside of the cake is chocolate cake with chocolate icing. It's only right that an Easter egg-shaped cake is filled with chocolate.
I'm so glad that I didn't go with my original plan to create a whole, standing up 3D egg shaped cake. That thing would have been a total bitch to cover in icing. It was already fairly difficult to get this as smooth as I wanted, I spent a good hour or so smoothing out the top surface. The good thing is, you're covering the thing in speckles anyway so it hides most of the imperfections.
The chocolate cake is the trusty Devil's Food Cake from David Lebovitz, I use it all the time and it's pretty much foolproof. The icing is just regular butter icing (with chocolate added to the middle layers), tinted with blue on the outside. I'm loving the pastel blue hue of the cake, it's so eye catching and what drew me to the original cake in the first place. I do realise that this cake has a LOT of icing, but it's worth it to get the full effect of the 3D egg-shape. The cake itself is really not very sweet because of all the cocoa powder, so it isn't overwhelmed by all the icing.
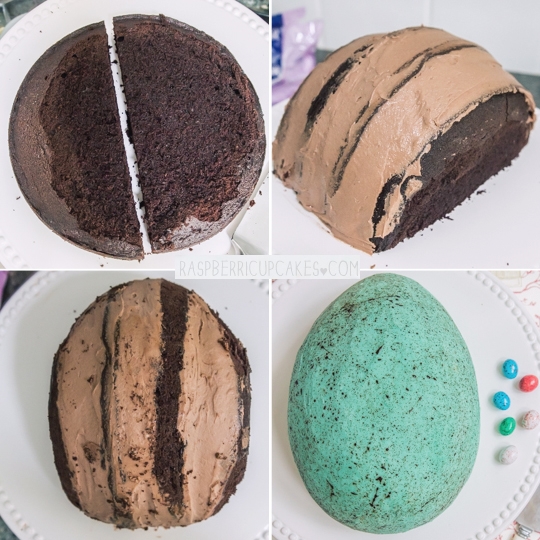
I even brought back the helpful progress photos below so that it's slightly easier for you to see how I made it (and because it's too darn confusing to explain what I did). Okay so tips for getting this cake right: don't rush it, it takes time. Your cakes need to be COMPLETELY COOL or chilled before you start cutting into them or they will crumble and fall apart. Your icing needs to be stiff enough to hold everything together, or it will fall over when you stand your cake pieces on their side. You need to chill it again after you sandwich the chocolate icing between the layers, before you cut it into the egg shape. Don't be afraid to carve into your cake to get the right shape, I know it seems wasteful but if you want to get the egg shape right you will need to cut away the right amount from the edges of your cake. And make sure the cake is completely chilled hard before you cover it in blue icing. A small offset spatula, regularly run under hot water will make icing the outside a LOT easier. Oh and don't be dumb like me and buy the softest, finest-bristled brush to do your speckling with, it won't work. You need one with fairly stiff bristles so that it's easy to flick.
Giant Chocolate Speckled Egg Cake
(cake recipe adapted from David Lebovitz's Devil's Food Cake)
For the chocolate cake:
9 tbsp unsweetened cocoa powder
1 1/2 cups (about 210g) cake flour (not self-raising, I just used plain flour and replaced 3 tbsp with cornflour/cornstarch)
1 1/2 cups (about 210g) cake flour (not self-raising, I just used plain flour and replaced 3 tbsp with cornflour/cornstarch)
1/2 tsp salt
1 tsp bicarb (baking) soda
1/4 tsp baking powder
115g (1 stick) unsalted butter, at room temperature (I used salted butter and reduced the 1/2 tsp salt above to 1/4 tsp)
1 1/2 cups (about 300g) caster sugar
2 large eggs, at room temperature
1/2 cup water
1/2 cup whole or low-fat milk
1 tsp bicarb (baking) soda
1/4 tsp baking powder
115g (1 stick) unsalted butter, at room temperature (I used salted butter and reduced the 1/2 tsp salt above to 1/4 tsp)
1 1/2 cups (about 300g) caster sugar
2 large eggs, at room temperature
1/2 cup water
1/2 cup whole or low-fat milk
- Butter and line the base of a two 8-inch (20cm) round cake tins and preheat oven to 180°C (350°F).
- Sift together the cocoa powder, flour, salt, bicarb soda, and baking powder in a bowl.
- Using an electric mixer with a large mixing bowl, beat together the butter and sugar about 5 minutes until smooth and creamy.
- Add the eggs one at a time and beat until fully incorporated.
- Mix together the water and milk. Stir half of the dry ingredients into the butter mixture, then add the milk mixture.
- Finally stir in the other half of the dry ingredients until smooth. Split batter mixture between the two prepared tins.
- Bake for about 25 minutes, or until a skewer inserted into the centre of the cake comes out clean. Remove from the oven and cool in tin about 5 mins, then place on a wire rack and cool completely before icing (you can also chill your cakes overnight, this will make them easier to handle and carve).
For the chocolate icing filling:
100g butter, removed from the fridge 30 minutes before starting
150g chocolate, melted (I used milk, you can also use semi-sweet or dark)
3 cups icing sugar (about 350g), sifted
1 tbsp milk
150g chocolate, melted (I used milk, you can also use semi-sweet or dark)
3 cups icing sugar (about 350g), sifted
1 tbsp milk
- Place butter in a large mixing bowl and beat with an electric mixer until light and fluffy.
- With the mixer on low speed, gradually add sifted icing sugar and beat until smooth and pale.
- Add melted chocolate and milk and beat until smooth. (You can adjust the amount of milk you add to get the icing to the texture you want, you want it to be smooth but not runny)
- Using a long serrated knife, level the top of your cakes so that they have a flat even surface.
- Stack the cakes on top of each other and cut them in two, slightly off centre, about 1.5cm off the centre so that you have two smaller pieces and two larger pieces (see top left photo)
- Using an offset spatula, spread icing on the bottom of one of the larger pieces, then sandwich it with the second larger piece and stand it on its side in the middle of your cake stand or plate. Spread more icing on the base of the two smaller pieces and place each half on either side of the large pieces, so you have the two larger pieces in the middle and the two smaller pieces on the outside (see top right photo). If you have having issues with the pieces sliding or falling over then your icing and cake are not stiff enough so place both in the fridge to allow them to stiffen up a bit before continuing.
- Place cake in the fridge to chill until it hardens up, at least 1 hour, then use your knife to trim the outer edges to resemble an egg shape (it needs to be cut slightly narrower and lower on one end and wider and higher on the other end).
- Return to the fridge while you prepare the outer icing.
For the outer icing:
300g butter, removed from the fridge 30 minutes before starting
600g (about 4 cups) icing sugar, sifted
1 tbsp milk
1 tsp vanilla extract
Blue/teal food colouring (I used Wilton's gel icing colors)
To decorate: 3 tsp vanilla extract + 2 tsp cocoa powder (you can also add water if mixture is too thick), to speckle cake
- Place butter in a large mixing bowl and beat with an electric mixer until light and fluffy.
- With the mixer on low speed, gradually add sifted icing sugar and beat until smooth and pale.
- Carefully add colouring little by little until you reach your desired colour.
- Use an offset spatula to crumb coat your cake with one layer of icing. Chill for half an hour.
- Cover entire cake with another layer of icing. Use an offset spatula that is regularly run under hot water to achieve a smoother finish for your egg-shaped cake. Chill again until ready to speckle.
- Mix vanilla and cocoa powder together in a small bowl. Cover your speckle area with lots of baking paper to protect it as speckles with go everywhere. Use a new/clean paintbrush with fairly stiff bristles and dip the tip into the mixture and practice flicking the bristles with your finger tips to create the speckle effect (more detailed instructions and photos here), before moving to the actual cake.
- Keep cake chilled until ready to serve, and then remove from fridge 30 mins before serving to allow cake to soften slightly.



0 comments:
Post a Comment