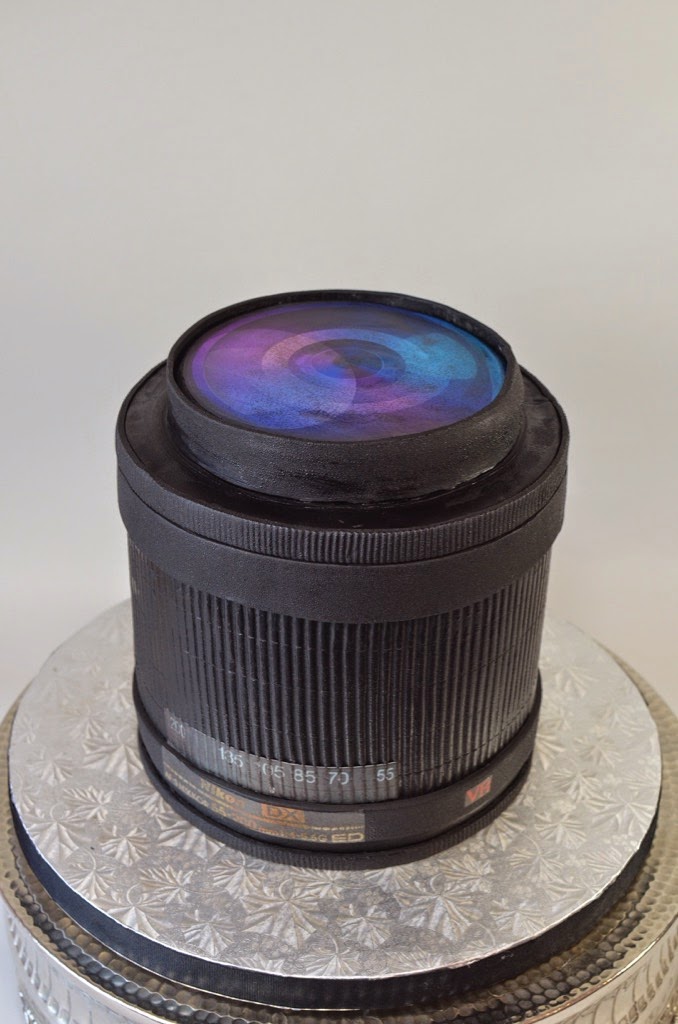
We have mentioned in previous posts about finding designs that will meet the needs of you client's vision and budget. This groom wanted a Nikon camera cake but that's a little involved. This camera lens cake was a cool compromise. It's still a cool cake but was six 9" round cakes and required only a tiny bit of carving. To be accurate I should have carved in at the bottom to about an 8" round but I didn't want to lose any structural integrity. This was a soft cake and it doesn't hold up well to a bunch of carving.
We used Fondarific in black for the sides. We rolled out the band and cut the right height. We then embossed a pattern to mimic the real thing and chilled it for a few minutes so the design didn't stretch out when applying it to the sides. Next we just added some bands with other textures on the top and bottom. This also helped give an illusion of a carved cake. Next we added a circle on top to be the "lens". We added some bands around the top lip and side of the lens. That piece was cut to go above the lens and give the appearance of a inset lens. I hope that makes sense, I know it sounds a little crazy. Just make sure all your bands line up the same in the back.
Chad printed the graphics out on edible image paper. My mistake on this cake was a common one. Anytime you apply an edible image, it needs to go onto a white or very light background or the color bleeds through the image. If you can't add a small piece of white fondant behind the graphic, then use a fresh page of edible image as a white background. I didn't and the black color came through. I know better! Bad cake decorator!
Home
»
2-tier cake
»
3D
»
edible image
»
Fondarific
»
groom's cake
»
sculpted
» Camera Lens Groom's Cake
Tuesday, 9 December 2014
Subscribe to:
Post Comments (Atom)
Popular Posts
-
Roasted Brussels Sprouts with Bacon & Almonds are the perfect side dish for any meal! Simple recipe and unbelievably delicious! #BaconMo...
-
This is the photo that I found taped to my door this morning when I got to work...so cute~I do not crochet or knit...but, I do know a cupcak...
-
If this entire blog wasn't already enough of a testament to my extreme sweet tooth, I'll share another bit of information. Throughou...
-
This recipe for Salted Caramel is easy and is great for topping all of your favorite desserts! I don't know who enjoys this Salted Cara...
-
My fellow Canadians - we live in a pretty amazing country, don't we? I thank the stars every day for being able to live in my city of Va...
-
10 soup recipes from your favorite bloggers! words Sicilian Chicken Soup - A Dash of Sanity Slow Cooker Chicken Posole - Love Bakes Good Ca...
-
These Bacon Cheddar Deviled Eggs are the perfect appetizer! Quick, easy and delicious! Are you a fan of deviled eggs? I have to be honest, ...
-
This is a sponsored conversation written by me on behalf of The J.M. Smucker Company®. The opinions and text are all mine. This Triple Berry...
-
As you read this, I'll be traveling to Nashville to attend a food blogger seminar put on by Food Blog Forum . I guess technically I am ...
-
Ditch the canned stuff! This Strawberry Buttercream Frosting is perfect with all kinds of cakes! With only 3 ingredients, it is sure to beco...


0 comments:
Post a Comment